Data Sources
To load data into a SQL project, use seed, source, or model gems. These are all based on dbt concepts.
Sources
Sources are pointers to tables in the SQL warehouse(s) specified in the SQL fabric.
- You can browse available tables in the Environment tab of the Project Editor. Tables can be dragged onto the model canvas.
- To upload a file to the warehouse directly from Prophecy, use the Upload File option.
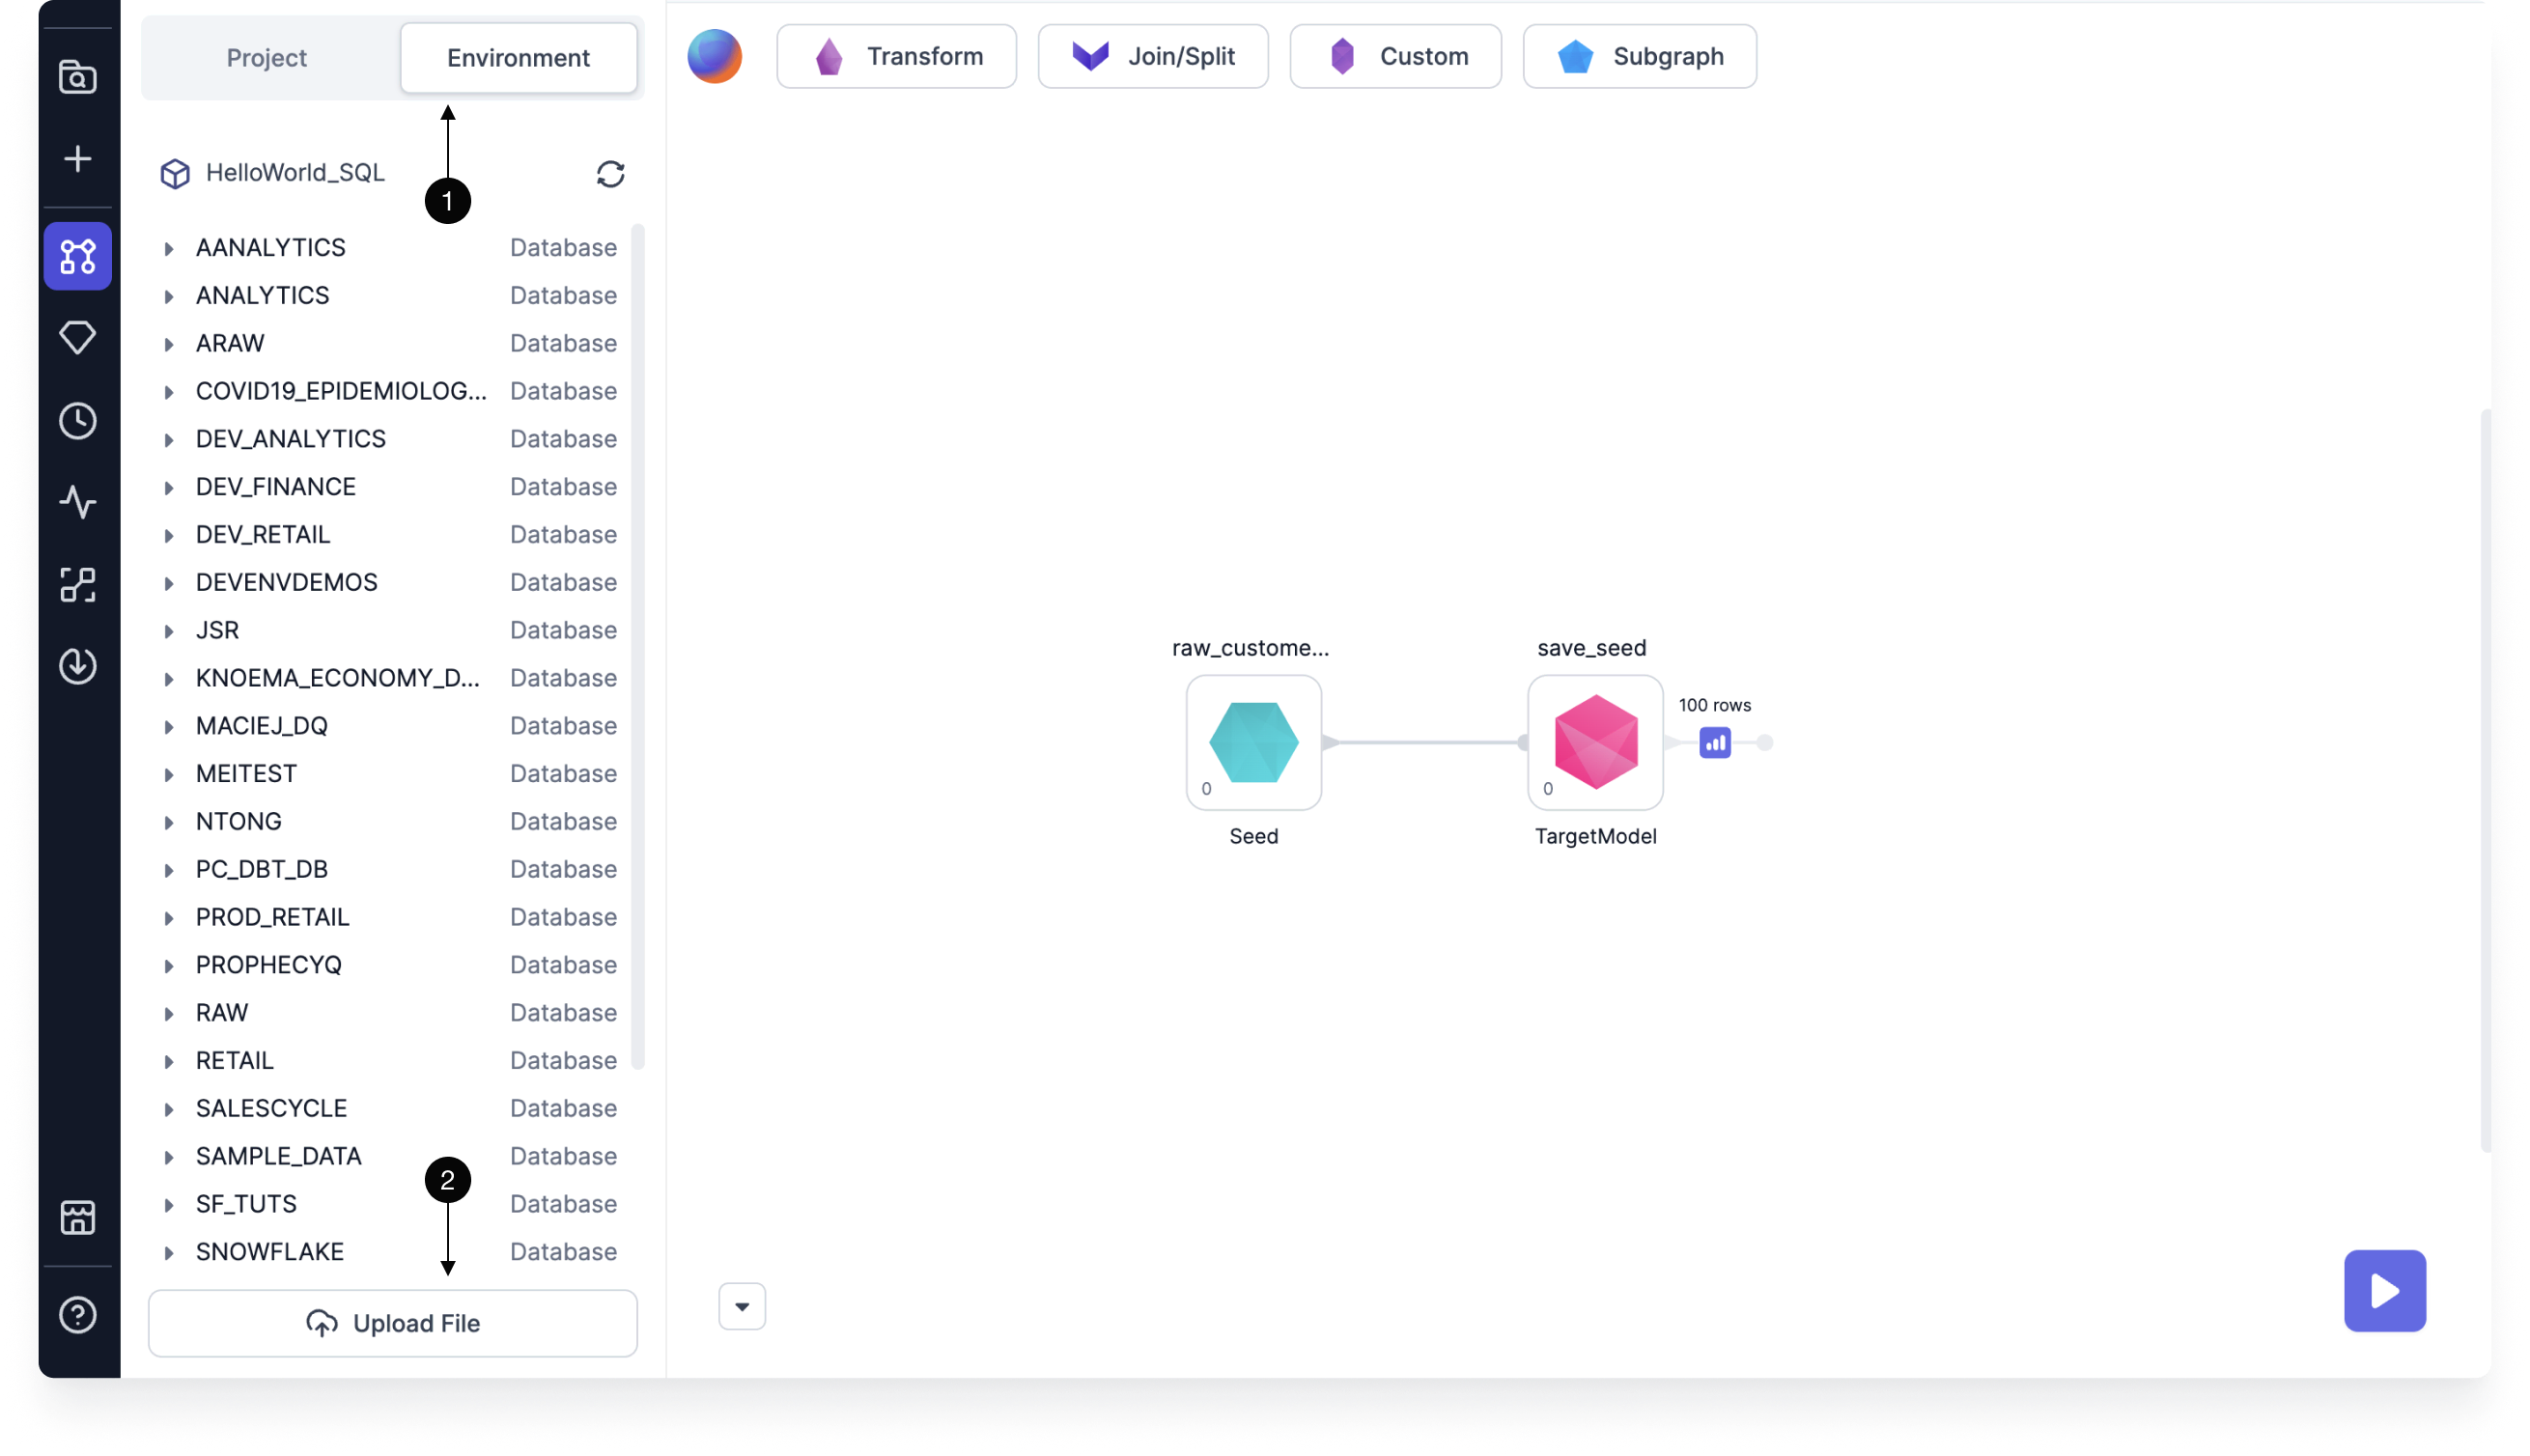
You can also add a source by clicking the plus sign next to Sources. Use this when you want to define your data model without a cluster connection or predefined table.
Seeds
Seeds let you load small CSV files into Prophecy. This is useful for small test datasets or lookup mappings, like a list of cities or countries. Seeds are saved as SQL files on Git when projects are committed and released. Follow the steps below to create a seed and write to the SQL warehouse defined in the fabric.
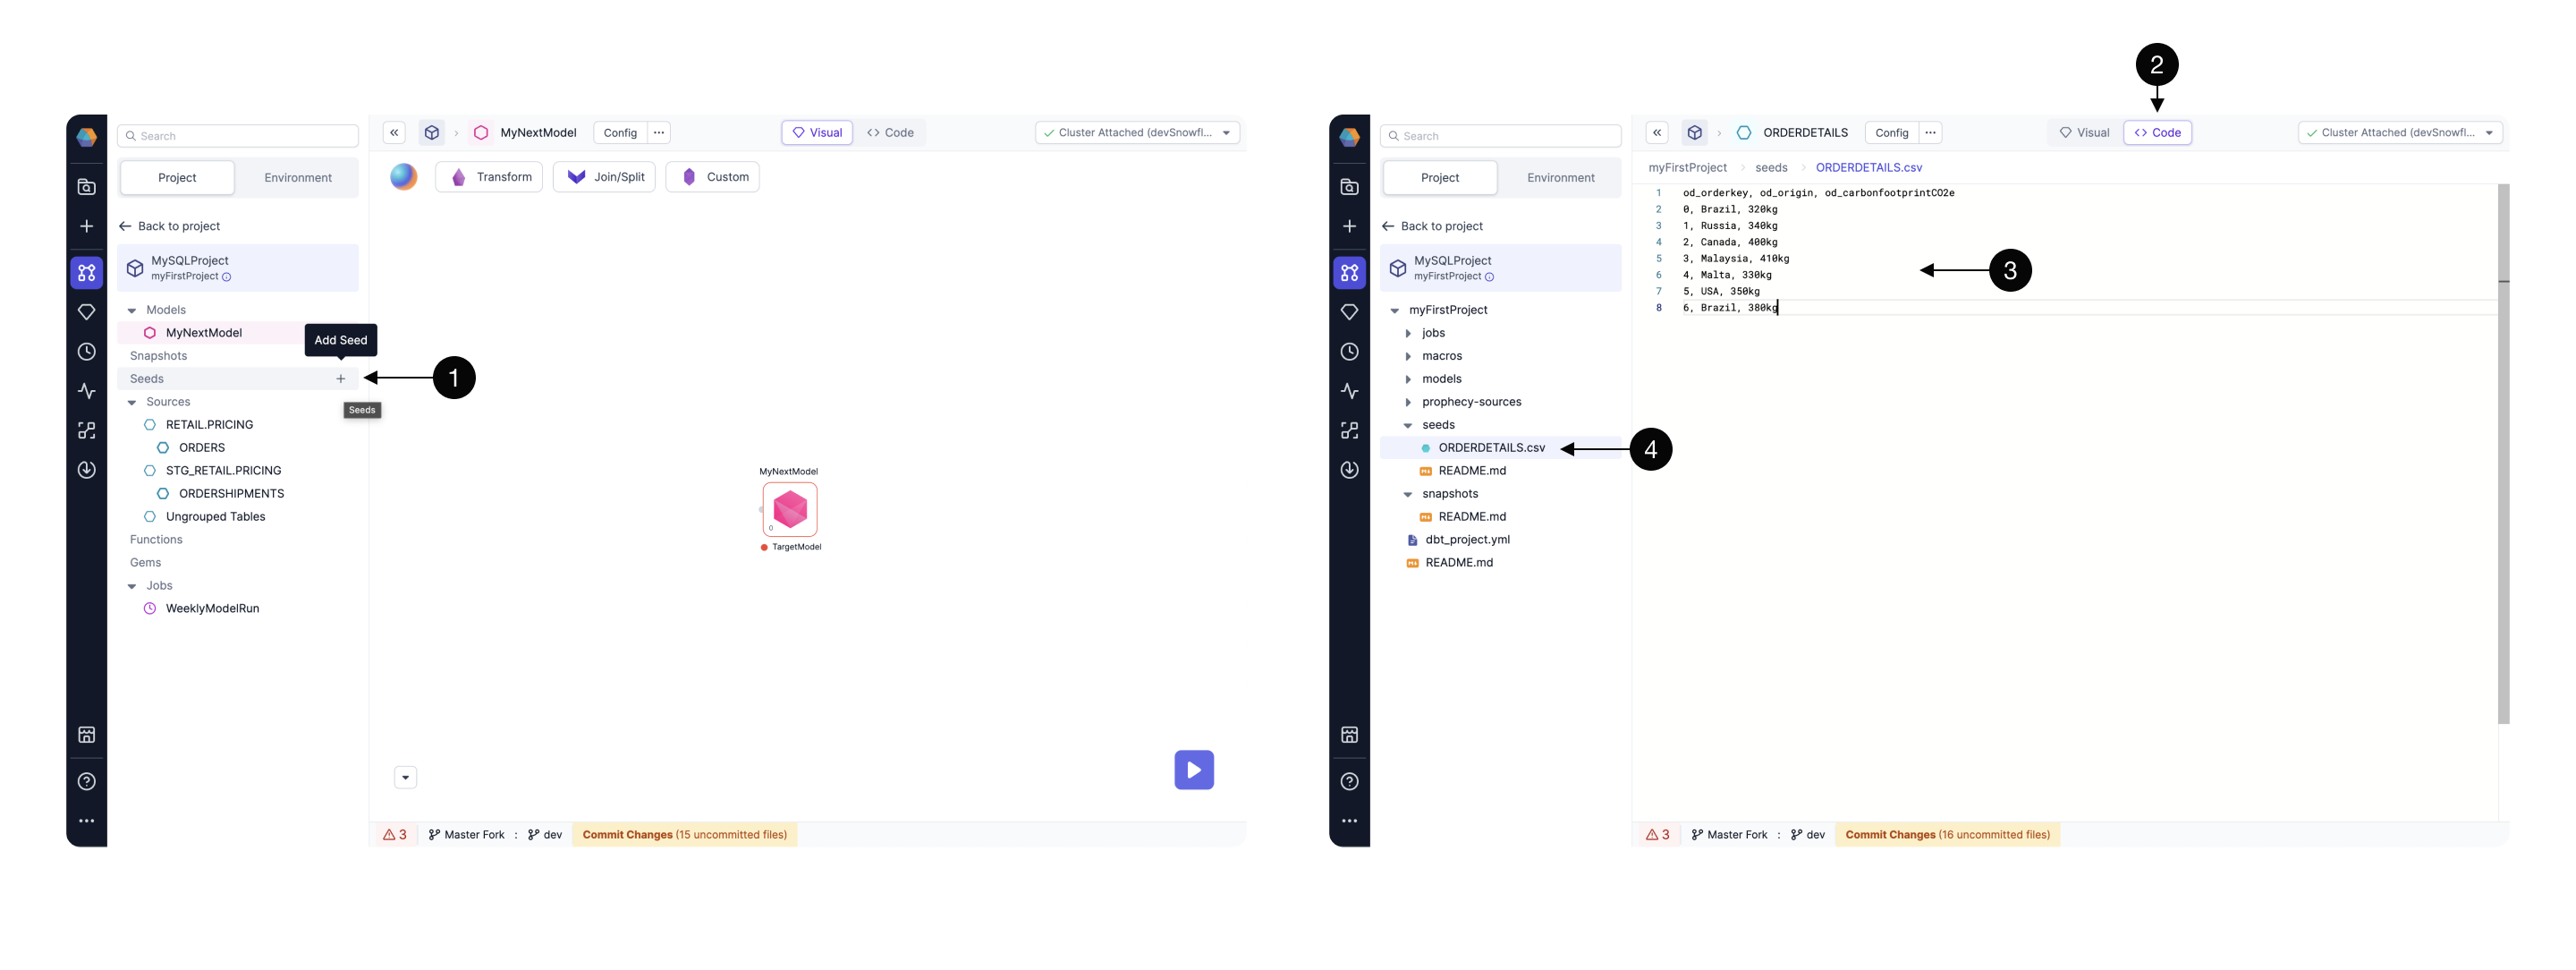
- Inside the model canvas, from the project tab, select + Add Seed and provide a name.
- Open the Code view to view the text editor. You'll see a file for your seed.
- Paste the data here in CSV format separated by commas.
- The seed file should be listed in the files that will be committed to Git.
- To make the seed usable in your project, run the seed by clicking the large play button in the bottom right corner.
To write the seed to your SQL warehouse:
- Create a new model and define its location.
- Add the seed to the model canvas.
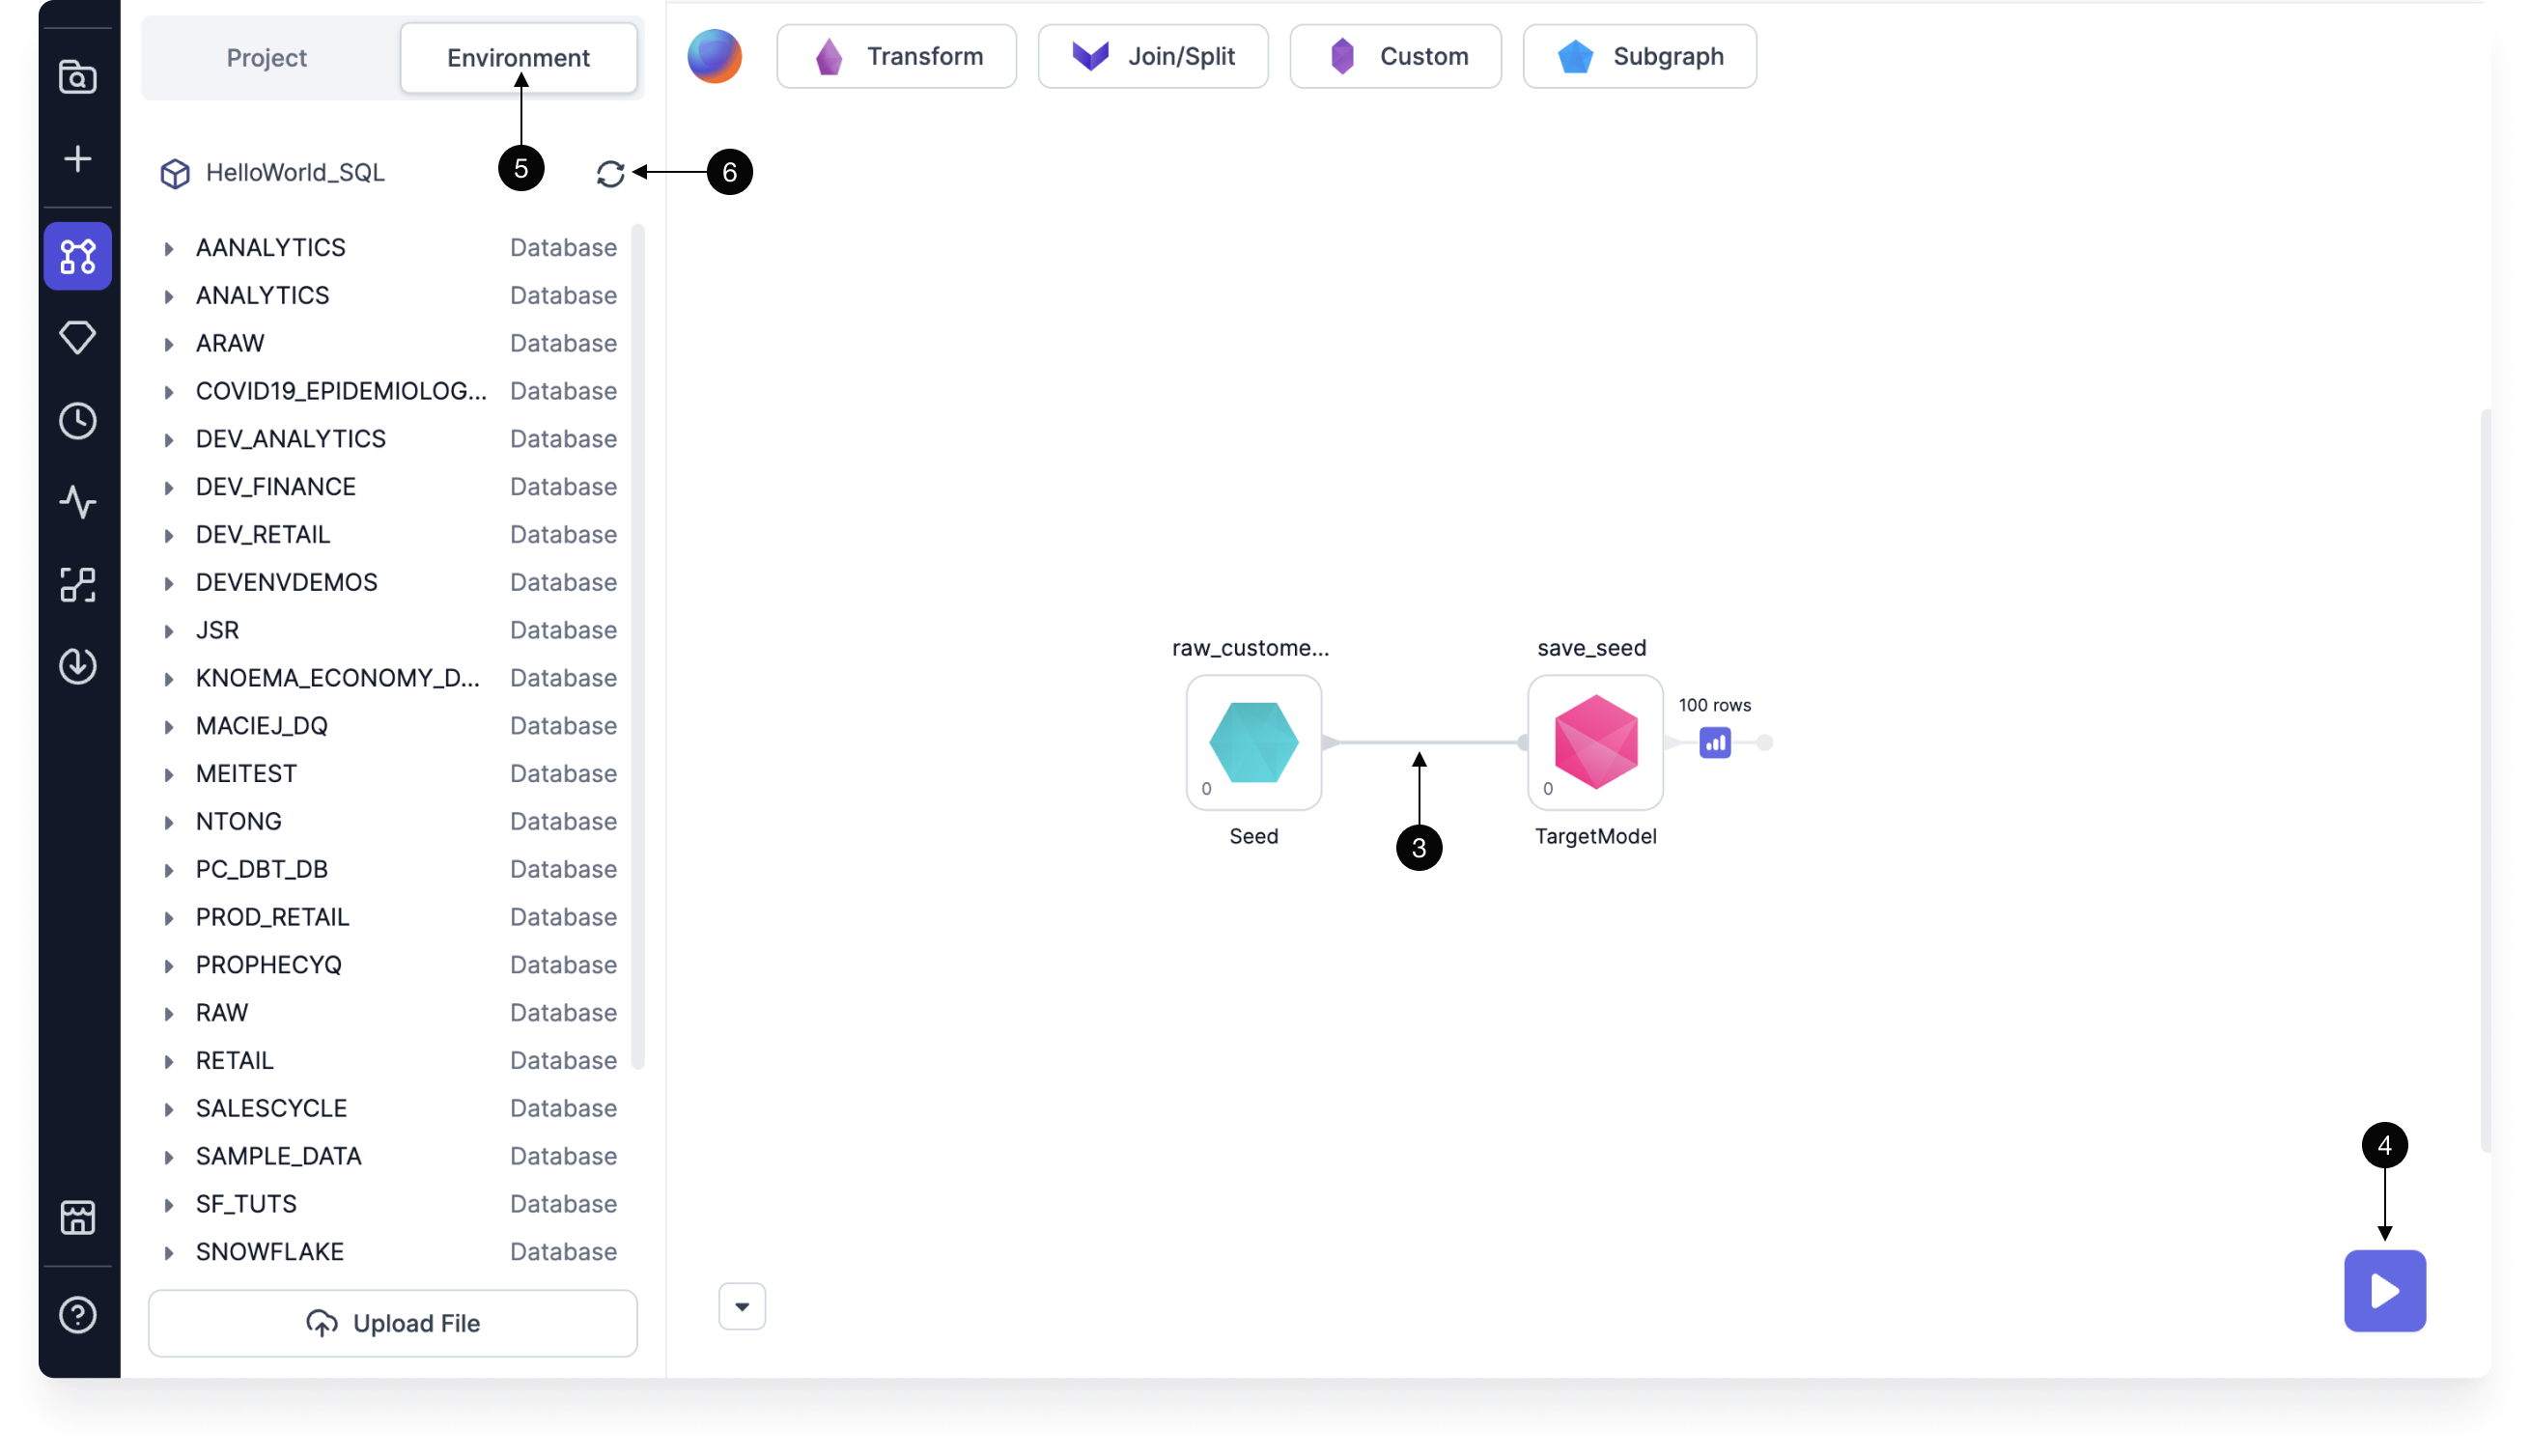
- Connect your seed to the Target Model gem.
- Run the model. This runs the Target Model gem that writes the seed to the warehouse.
- To view the new table in your SQL warehouse, click on the Environment tab in the project.
- Use the Refetch Sources button to resync the data.
- Now, you should see the new table.
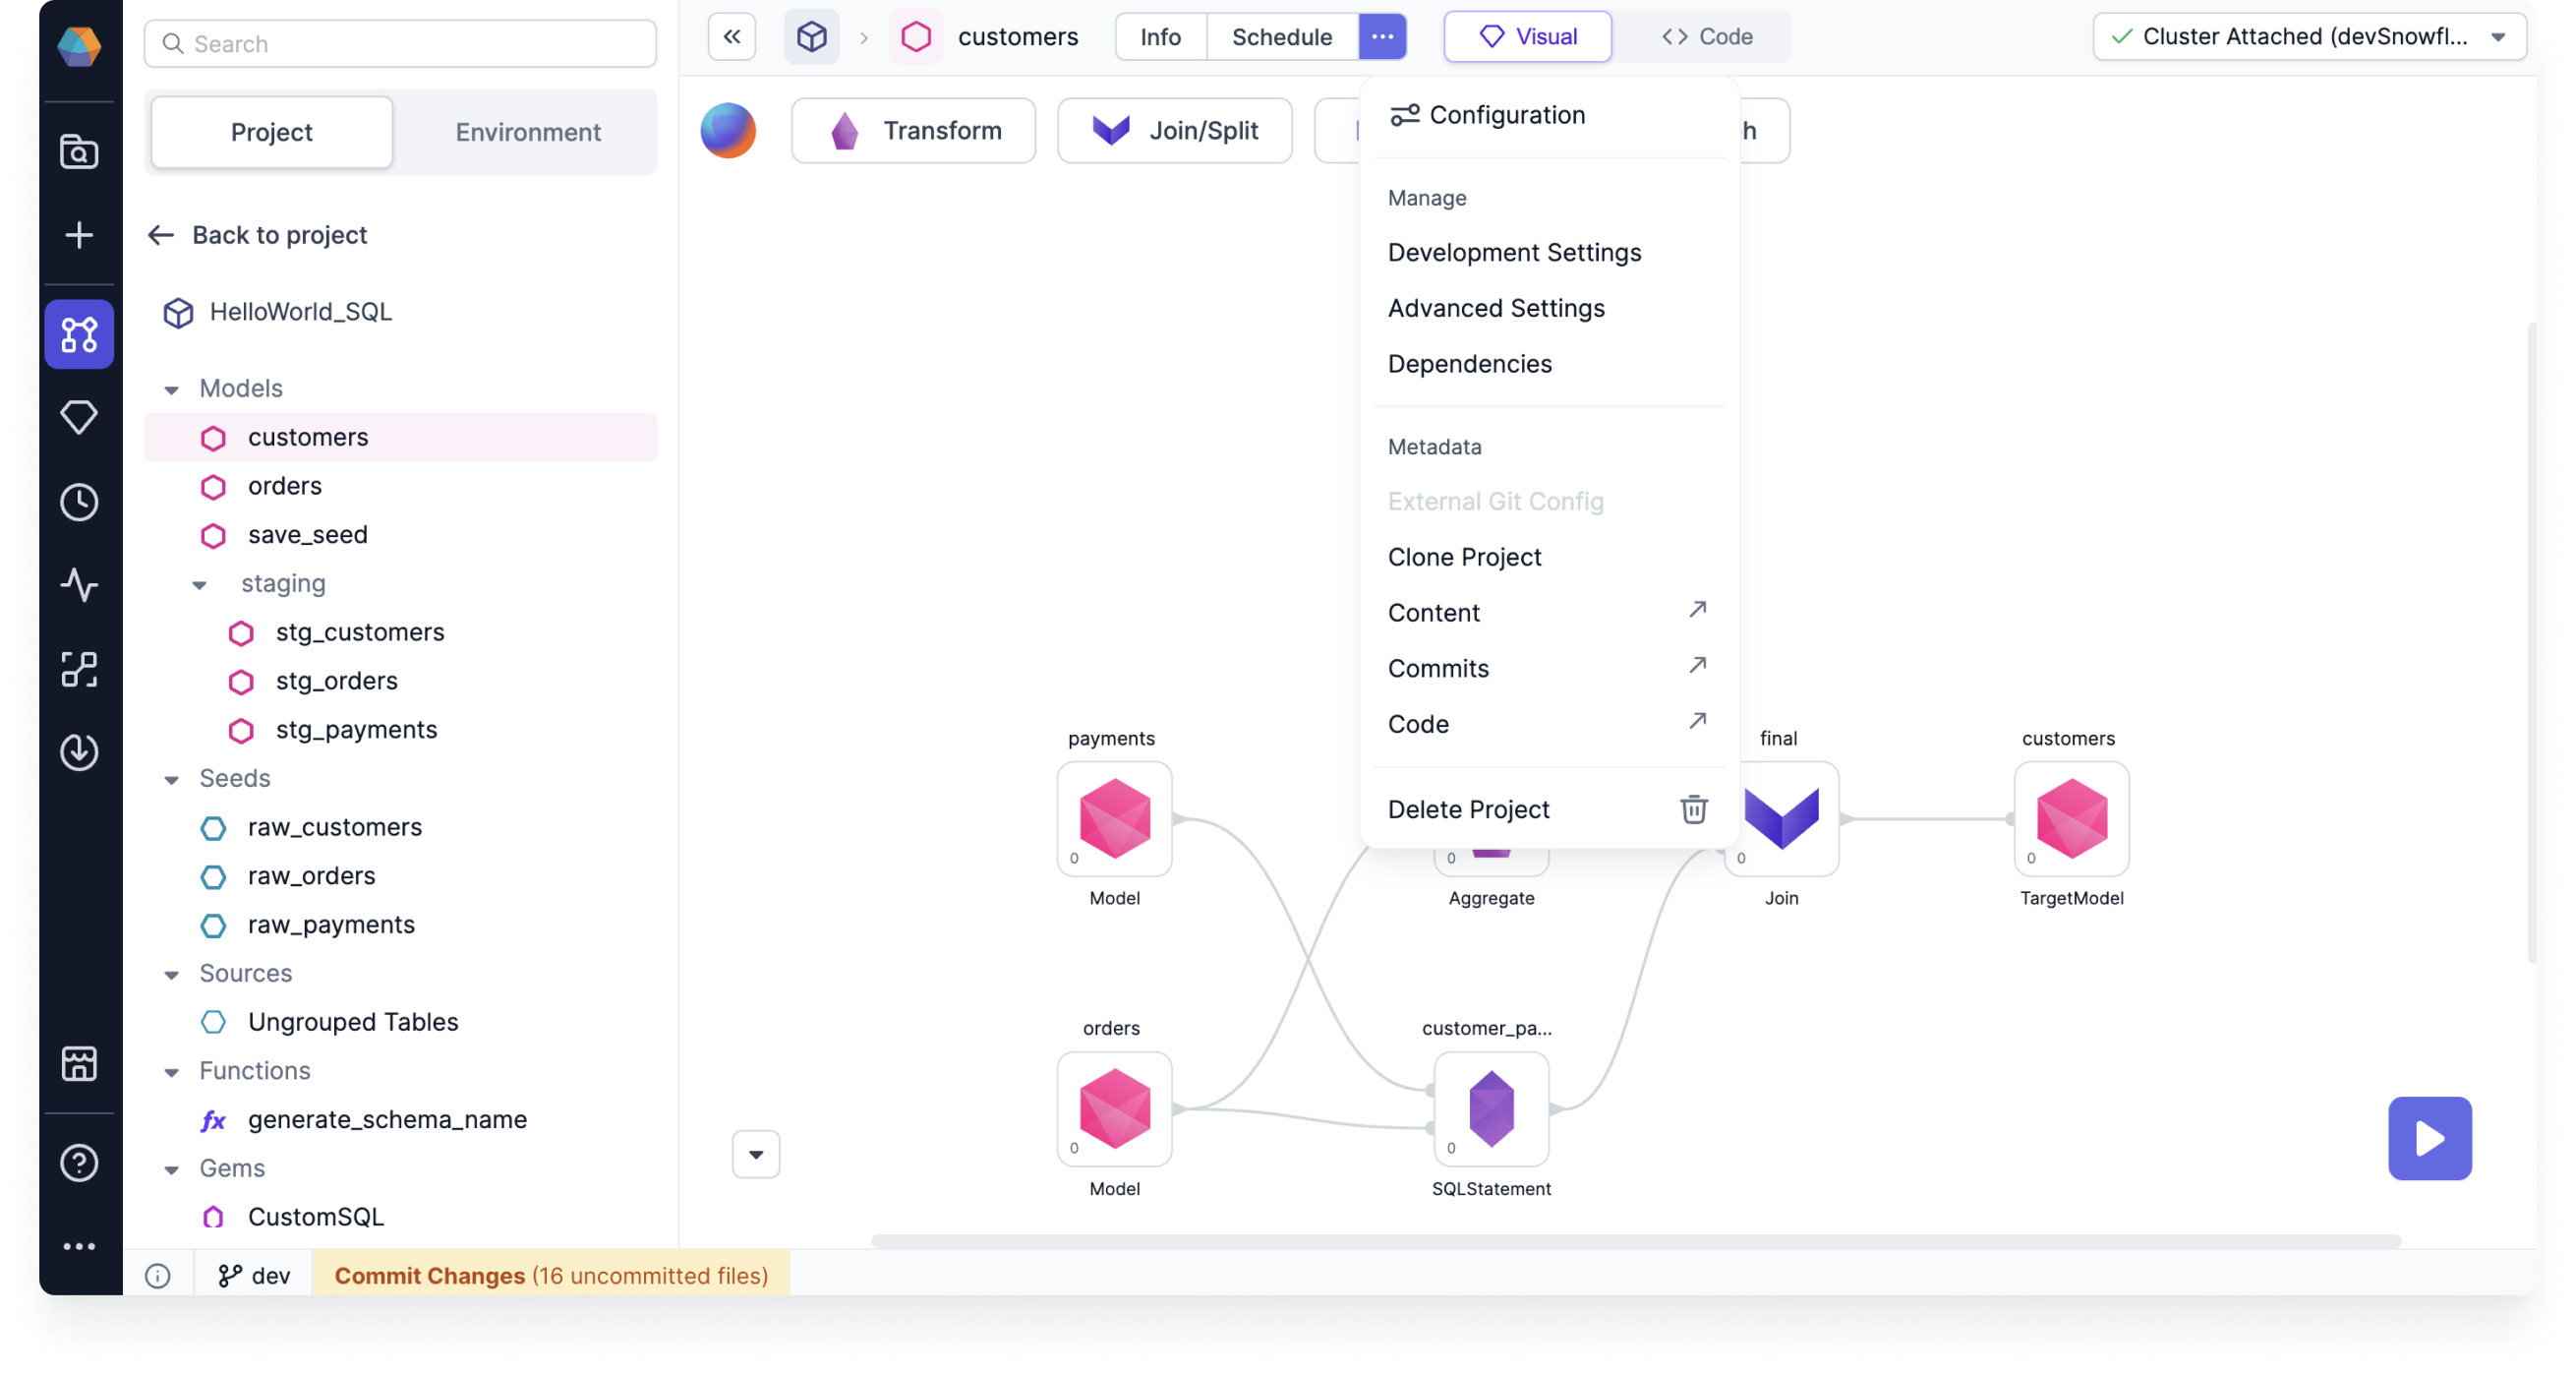
Models
A model is similar to a pipeline, as both contain data transformation steps. Unlike a pipeline, however, each model defines a single materialized view or table. Because models define a single materialized view or table, models can serve as inputs to other models. Each model is a single SQL file in the Code view.
To create a new model:
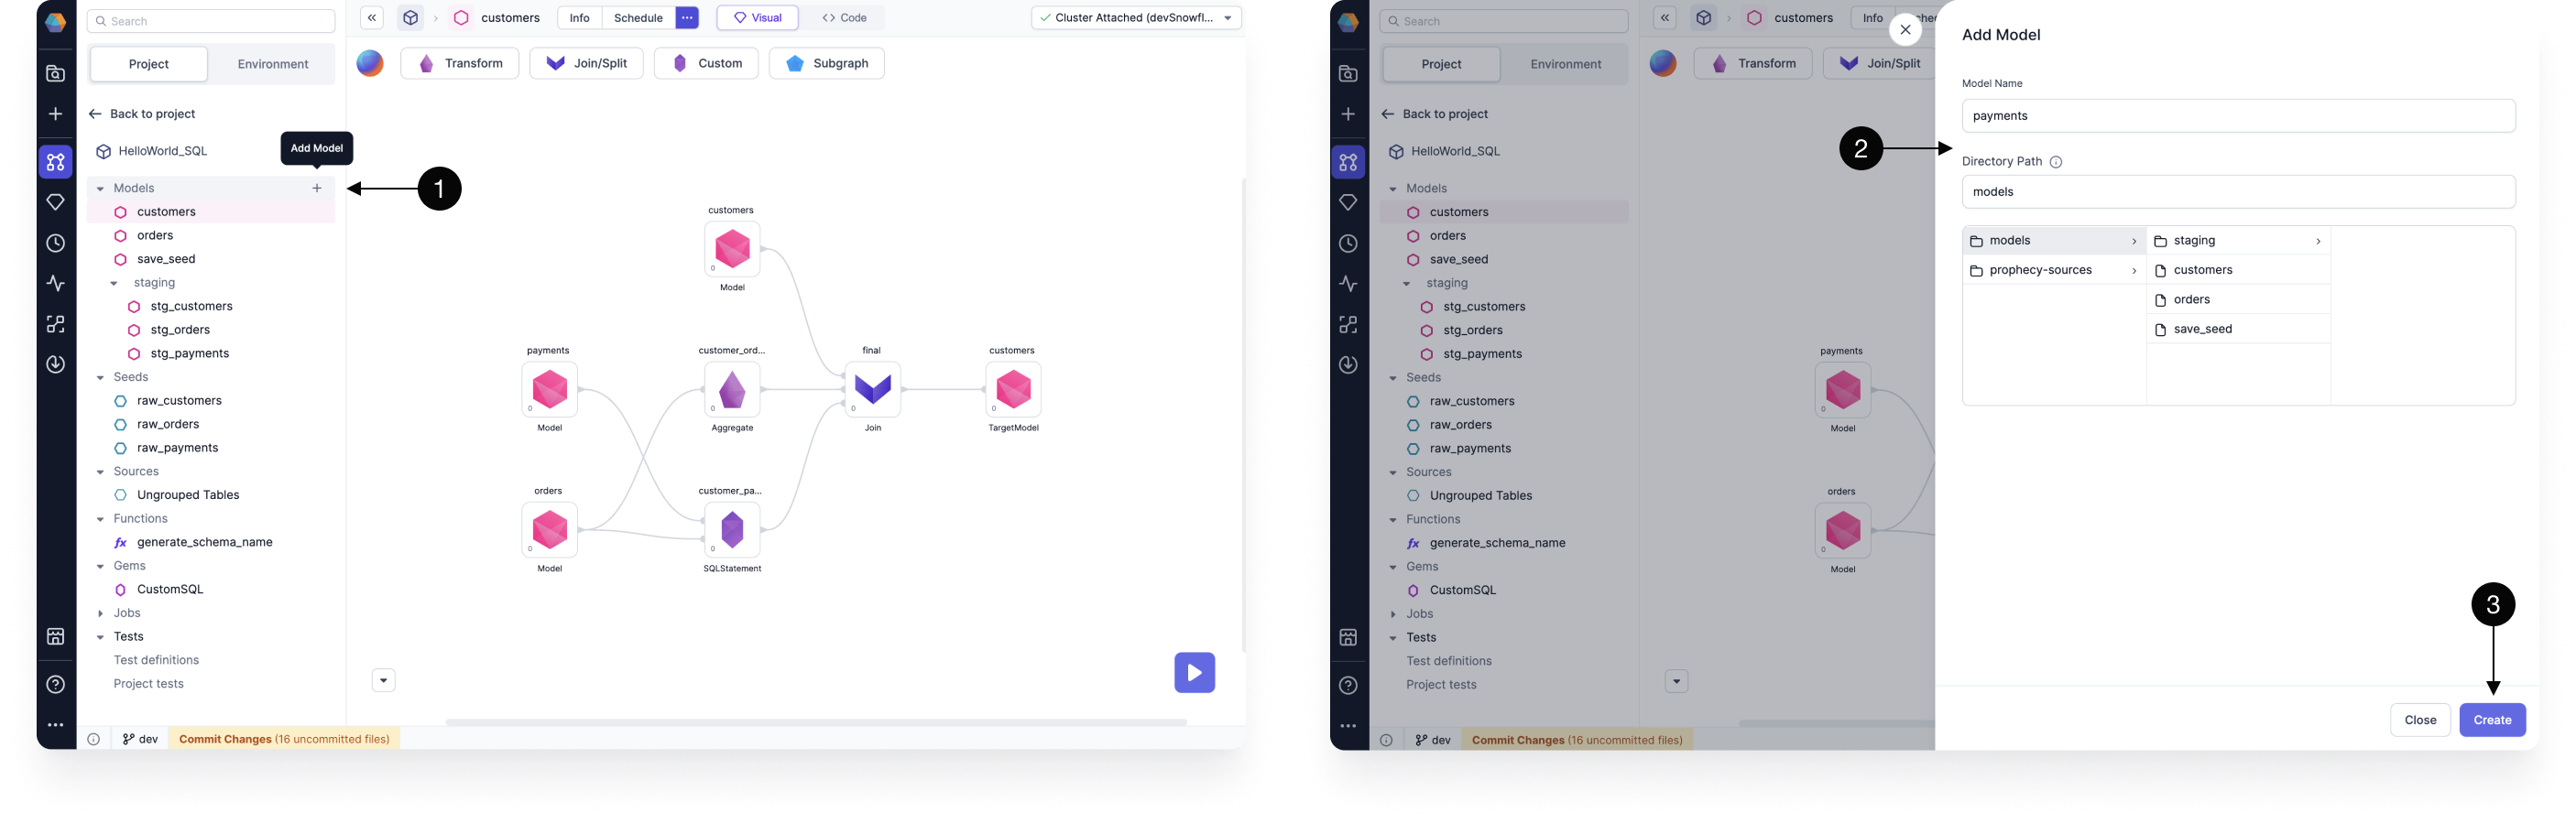
- Click the plus sign next to Models.
- Provide a name for the new model and define the desired storage path in Git to store the new model SQL file.
- Click Create. This opens the model canvas. A Target Model gem automatically appears on the canvas.
You can't use statements (such as CALL and EXECUTE IMMEDIATE) directly inside of models. Instead, you must use them in pre-hooks.
Advanced model settings
The advanced settings of a model let you define whether the model should be materialized as a view, table, ephemeral, incremental, or dynamic table.
What's next
For more details on dbt concepts including sources, seeds, and models, explore the dbt documentation or check out the SQL with Databricks tutorial.