Prophecy Managed
If you are new to Airflow and do not have an Airflow Instance running in your environment, we provide a Prophecy Managed Airflow to expedite your trial and POC.
You can use this to connect to your Spark or SQL execution env and try out scheduling for your Spark Pipelines or SQL Models.
Let's see how to set up this Fabric.
How to create Prophecy Managed Airflow Fabric
Setting up a Fabric is very straightforward. Click the (1) Create Entity button, and choose (2) Create Fabric option. The Fabric creation is composed of two steps: Basic Info and Providers setup. On the Basic Info screen, enter a (1) Fabric Name, (2) Fabric Description, and choose the (3) Team that’s going to own the Fabric.
Once ready, click (4) Continue.

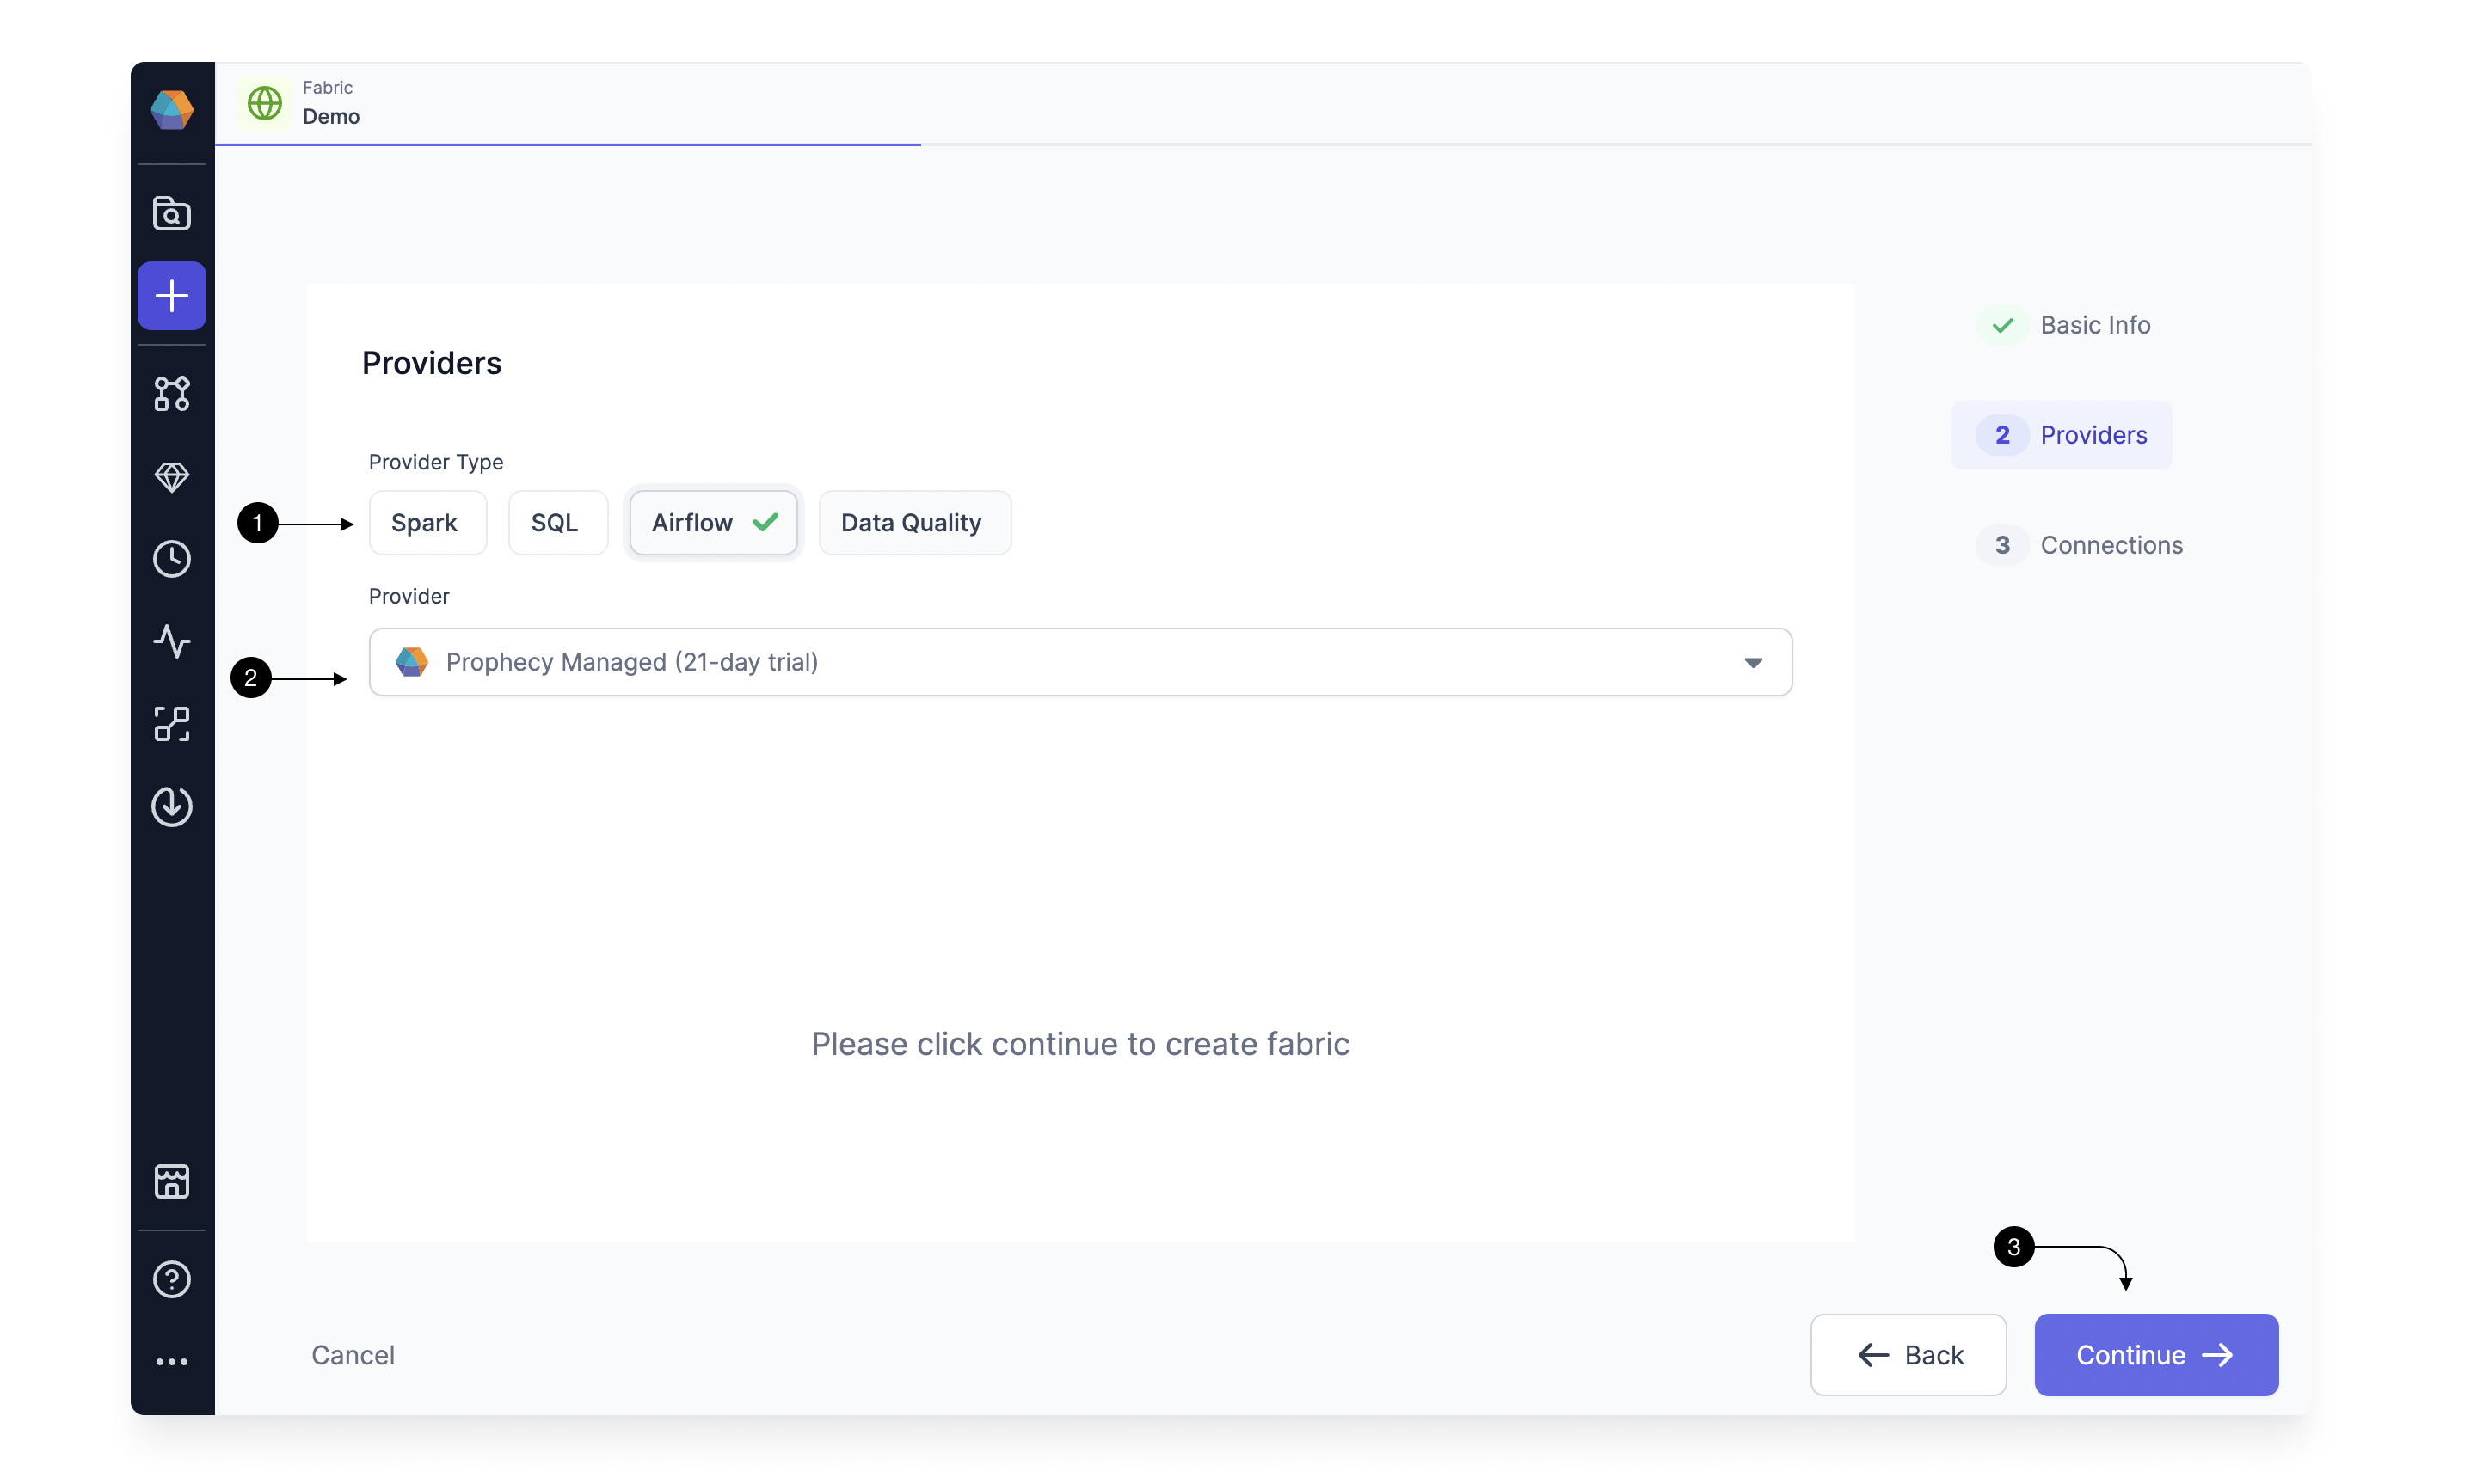
Since we’re setting up a Fabric connected to Airflow, choose Airflow as the (1) Provider Type and Prophecy Managed as the (2) Provider. For connecting to Prophecy Managed Airflow, you don't need to provide any other details, so go ahead and click on (3) Continue.
This completes the Fabric creation for you. Now you can start setting up optional connections for Prophecy Managed Airflow to your AWS/Databricks etc. Also keep in mind there are some Limitations that larger teams may experience when using Prophecy Managed Airflow. Please reach out to support@Prophecy.io if these limitations block your use cases.
🗃️ Connections
5 items
📄️ Limits and Restrictions
Limits and Security restrictions for Prophecy Managed Airflow
Create an Airflow Job
Once the Prophecy Managed Airflow Fabric is setup with the relevant connections, Airflow Job scheduling is done with a low-code easy-to-user interface. Follow this guide to Create an Airflow Job.