Azure Synapse Analytics
In the context of Spark execution engines, users have the flexibility to opt for Azure Synapse Analytics while utilizing Prophecy. This comprehensive documentation aims to provide users with a clear understanding of the configuration process for Azure Synapse Analytics. Additionally, it offers step-by-step guidance on creating a Fabric that enables seamless connectivity to the Azure Synapse Workspace via Livy.
Feel free to explore the following sections to gain insights into the integration of Azure Synapse Analytics with Prophecy.
An existing Azure Synapse Analytics environment
A properly configured Azure Synapse Analytics environment is required before configuring a Synapse Fabric on Prophecy. Prophecy configurations include the following:
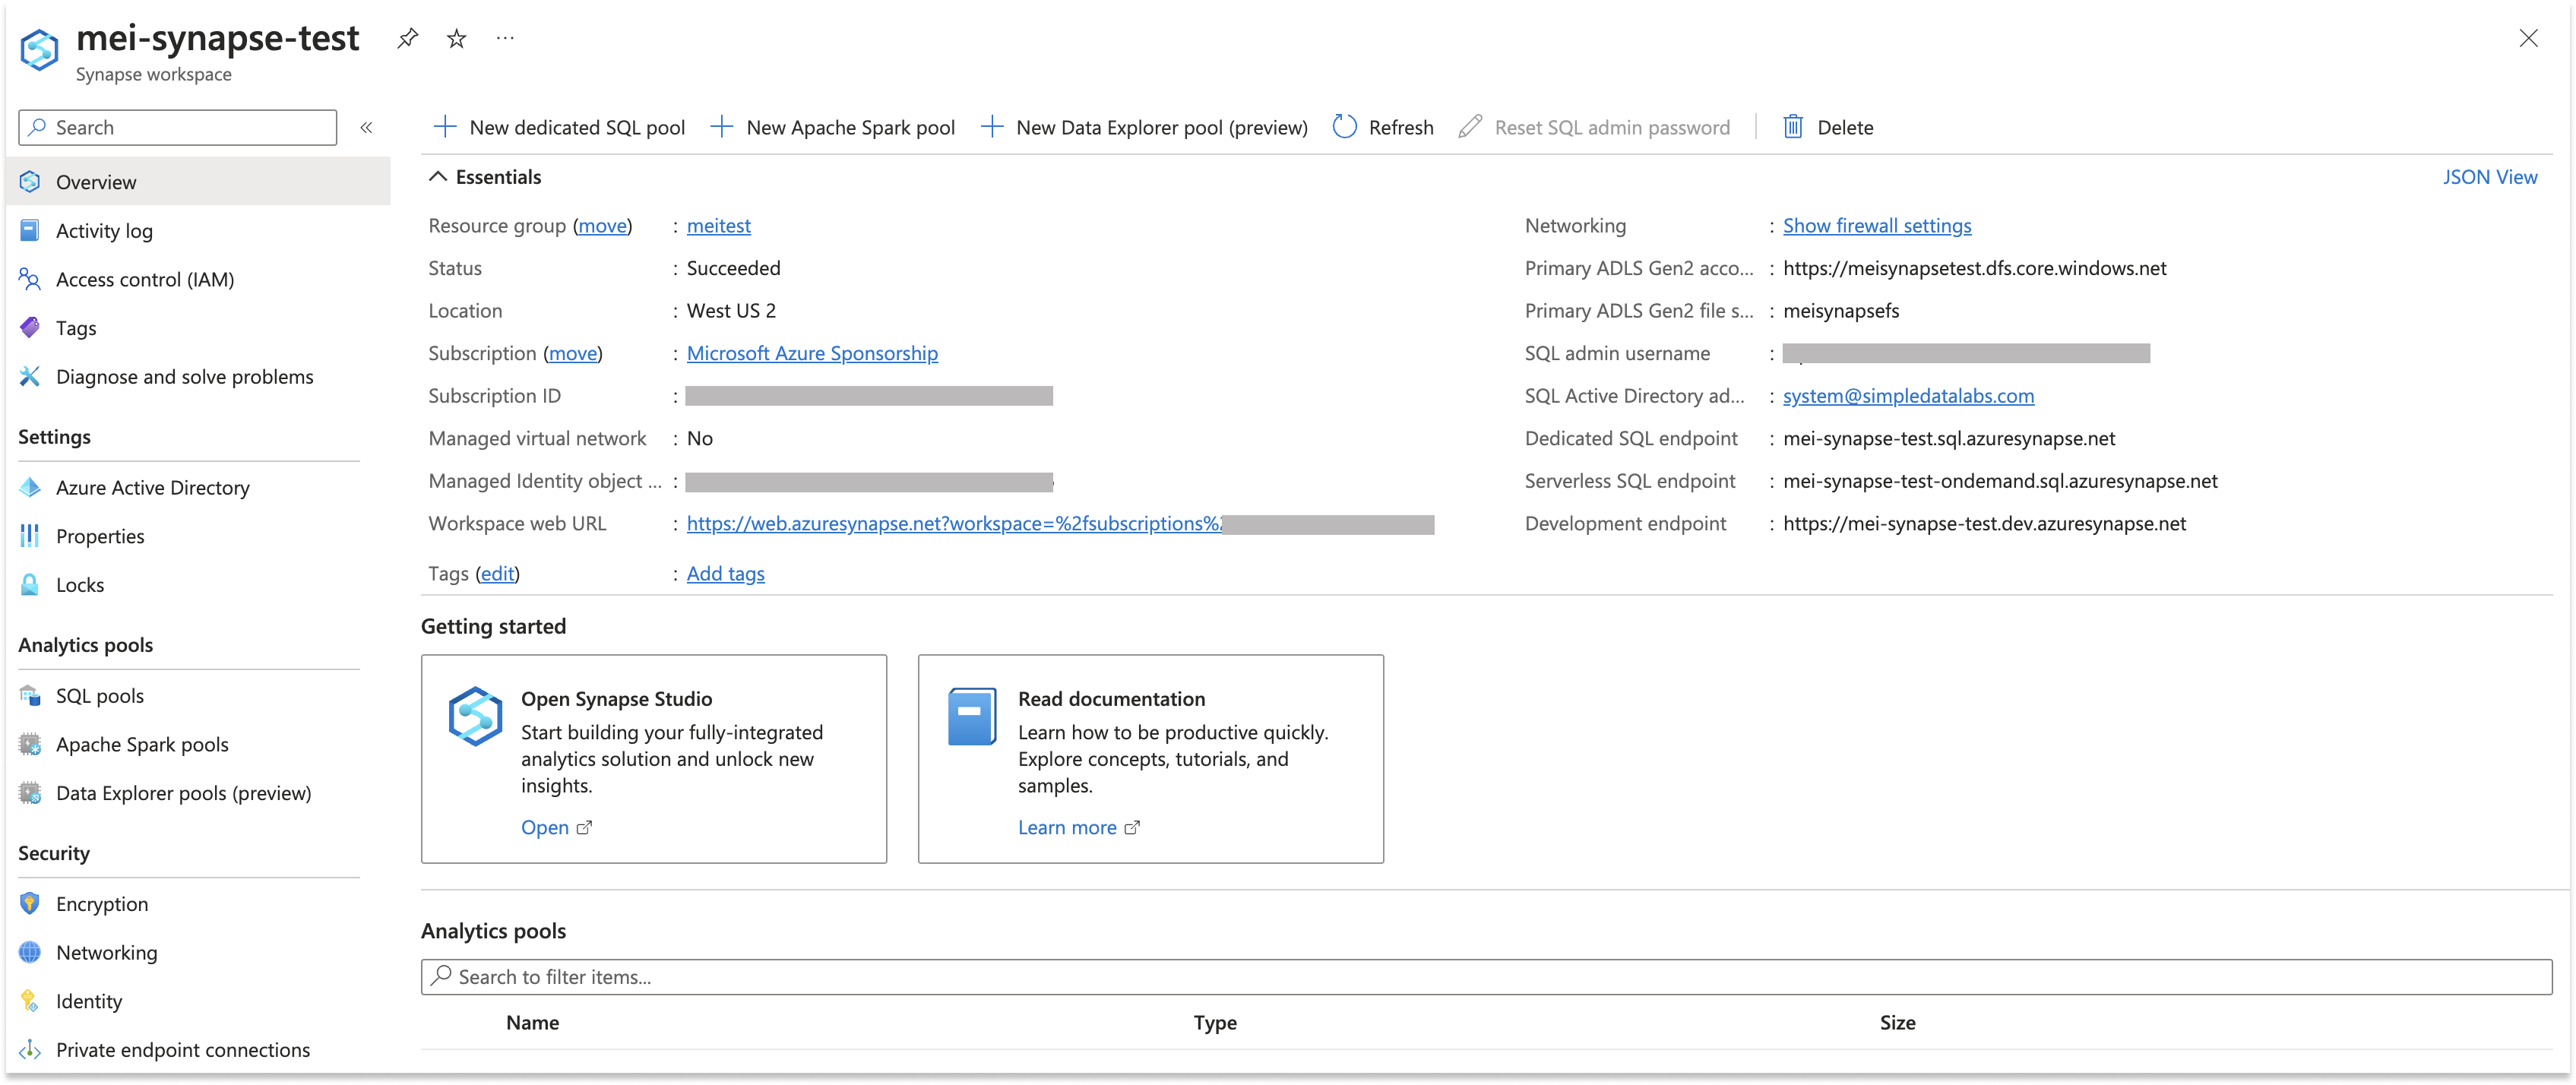
A Synapse workspace with proper security configured. If you don't have an existing workspace, you may deploy one from the Azure Marketplace.
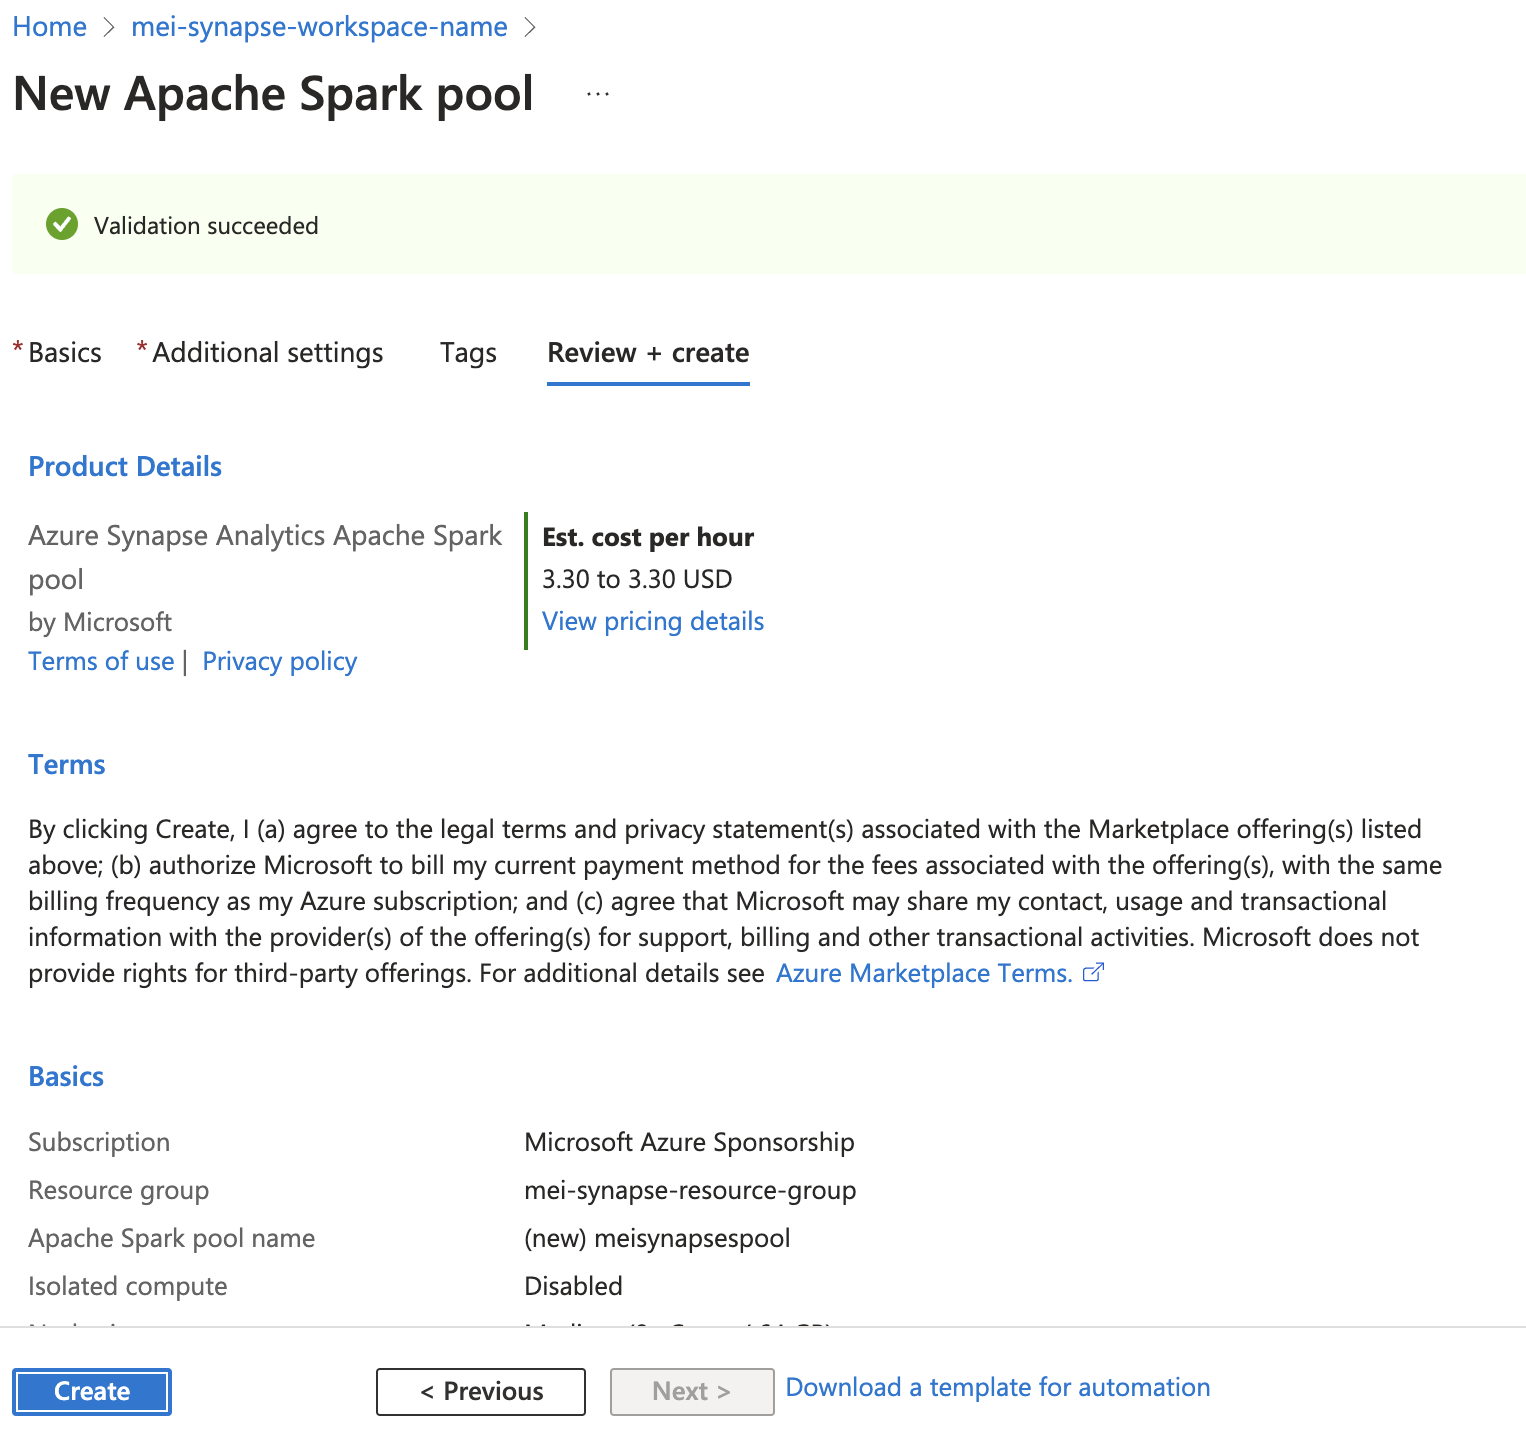
Deploy a Synapse Spark Pool if one doesn't already exist.
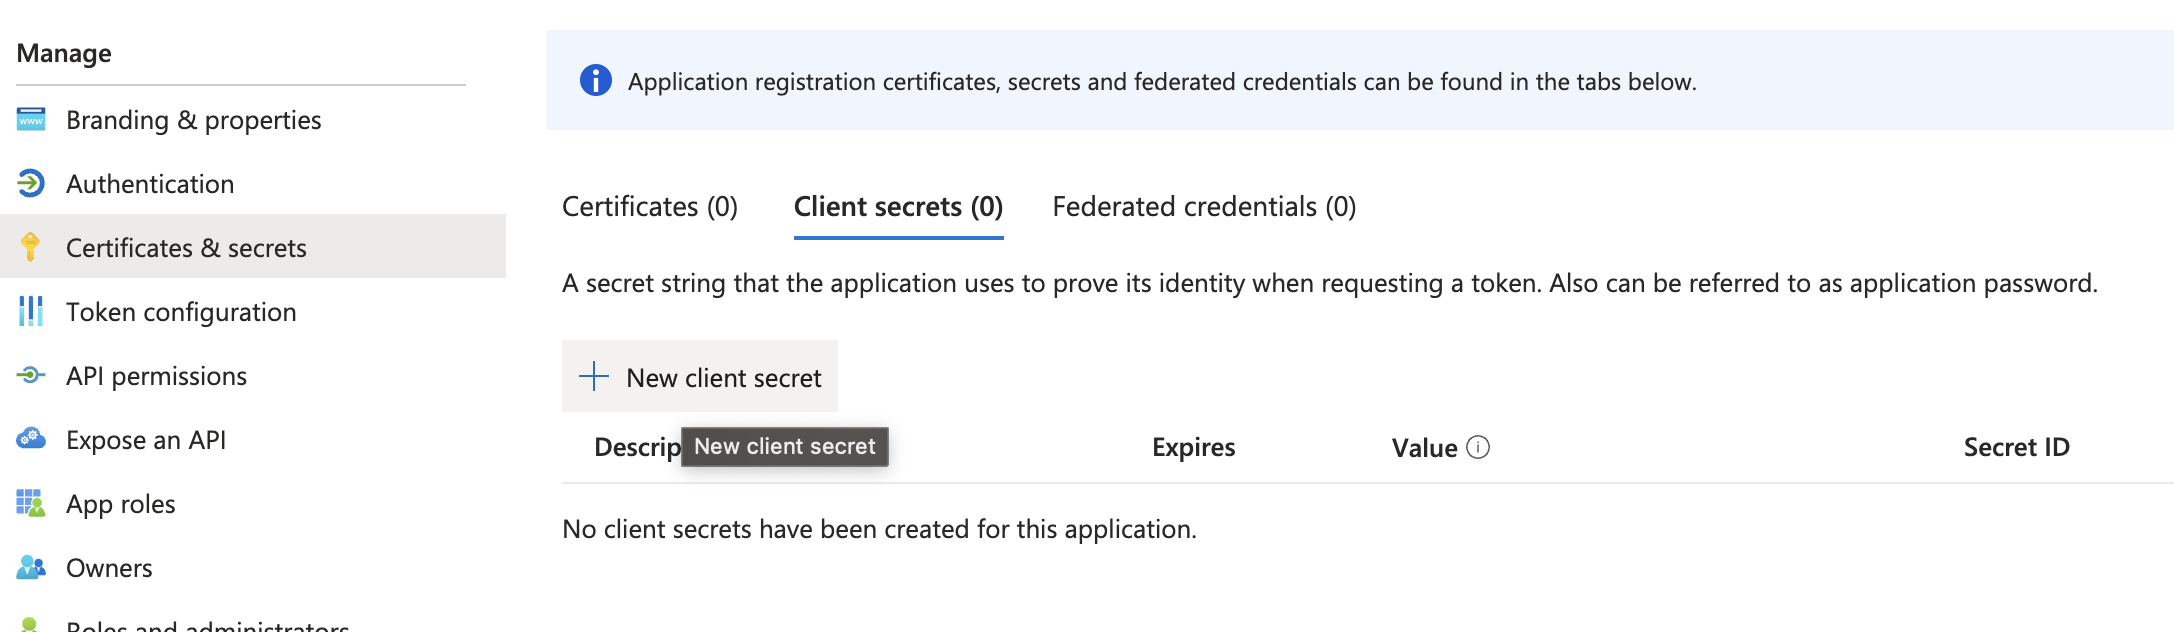
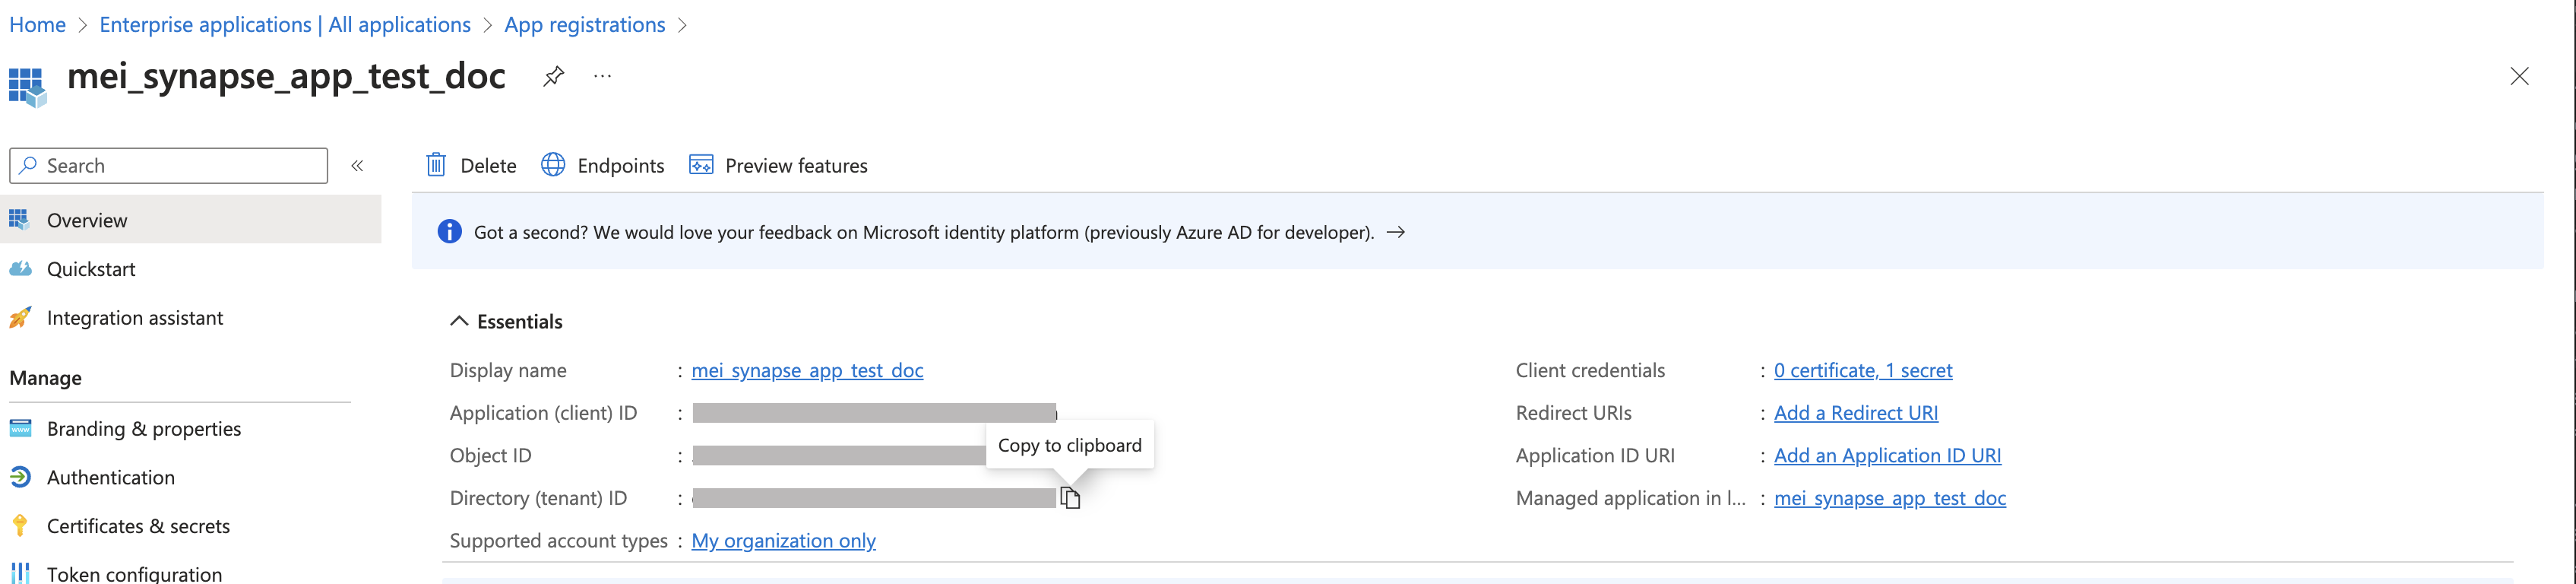
Make sure the Application is registered.

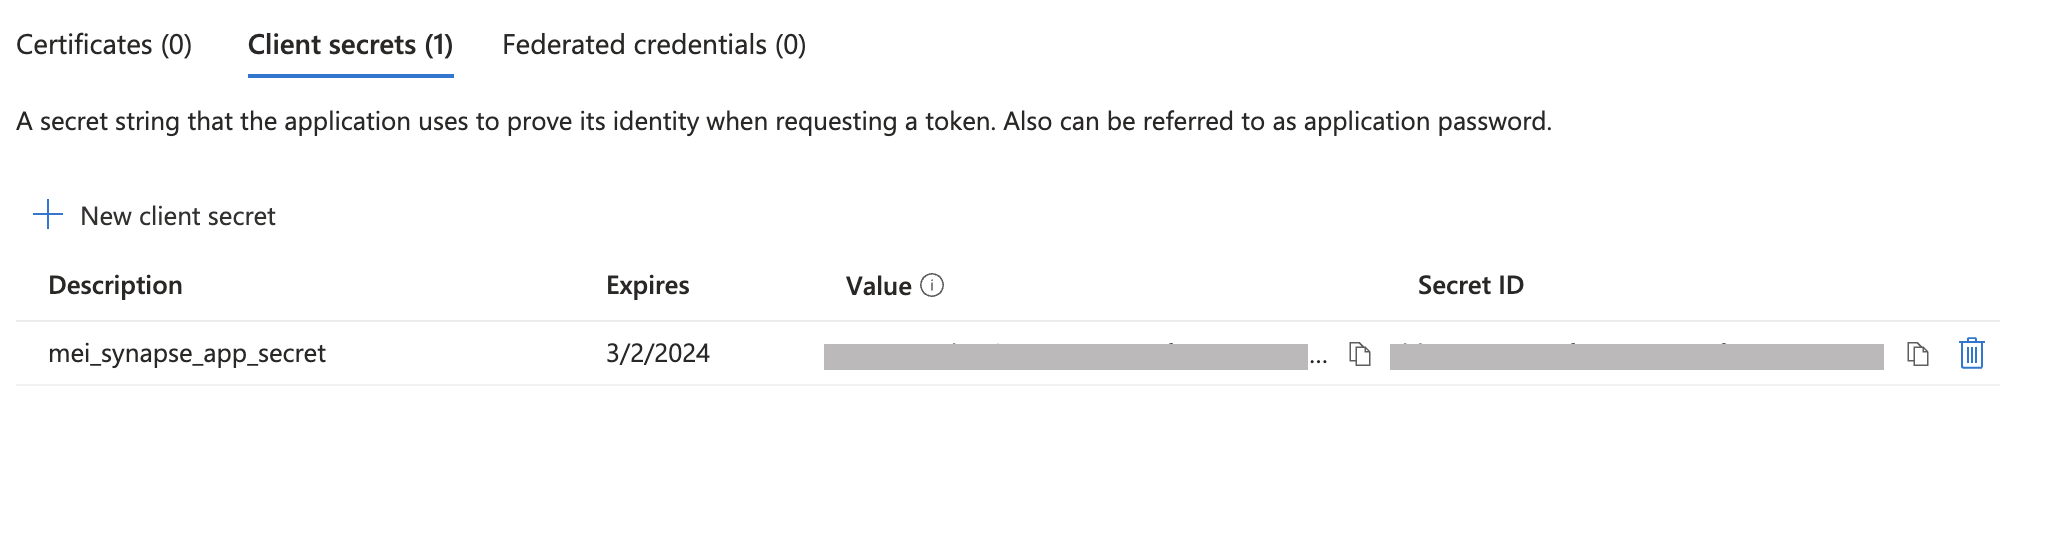
Create a secret for your Application.
Make a note of your secret. We need this information for your Fabric.
Configure Application, Workspace, Storage roles to ensure proper access.
Find more information on assigning roles from Azure's documentation.
Configure connectivity between Synapse and Prophecy
Please note that the Prophecy public IP is 3.133.35.237.
Navigate to Prophecy's UI and click on Create Fabric. The Fabric will establish a connection with your Synapse environment and utilize it as the execution engine for your Pipelines.
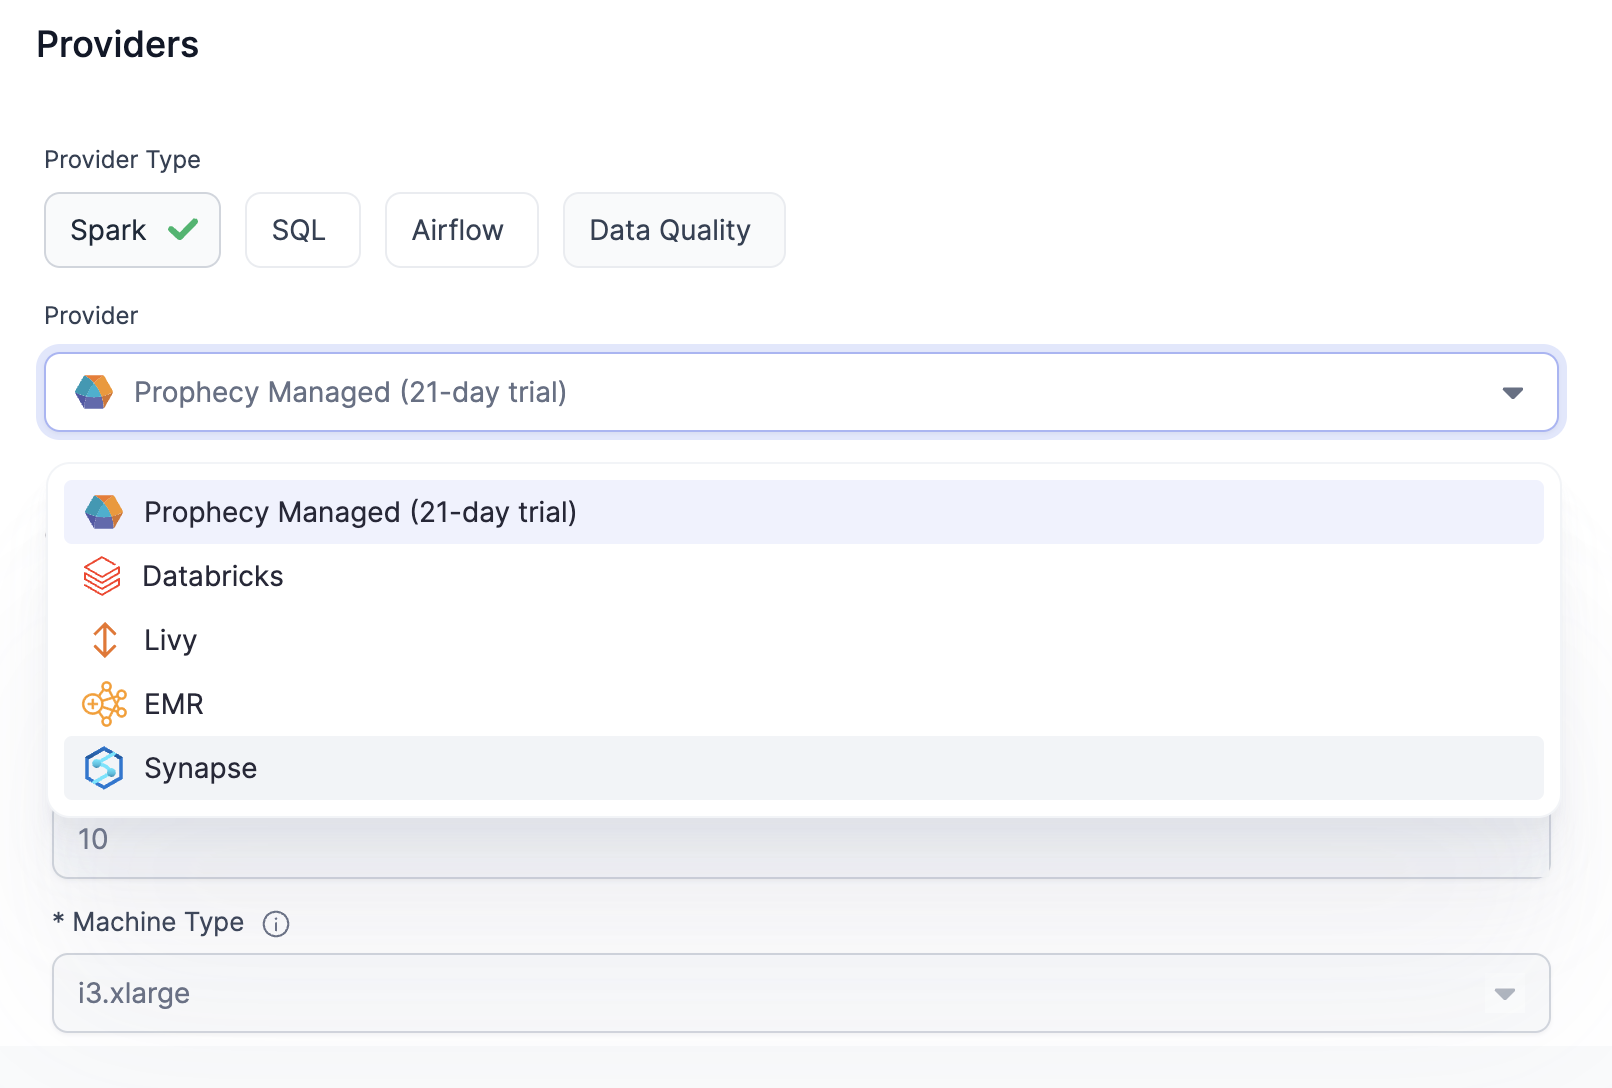
Choose Synapse as your Provider.
Copy and paste your Application Client ID, Secret Value and Tenant ID from the App Registration page.
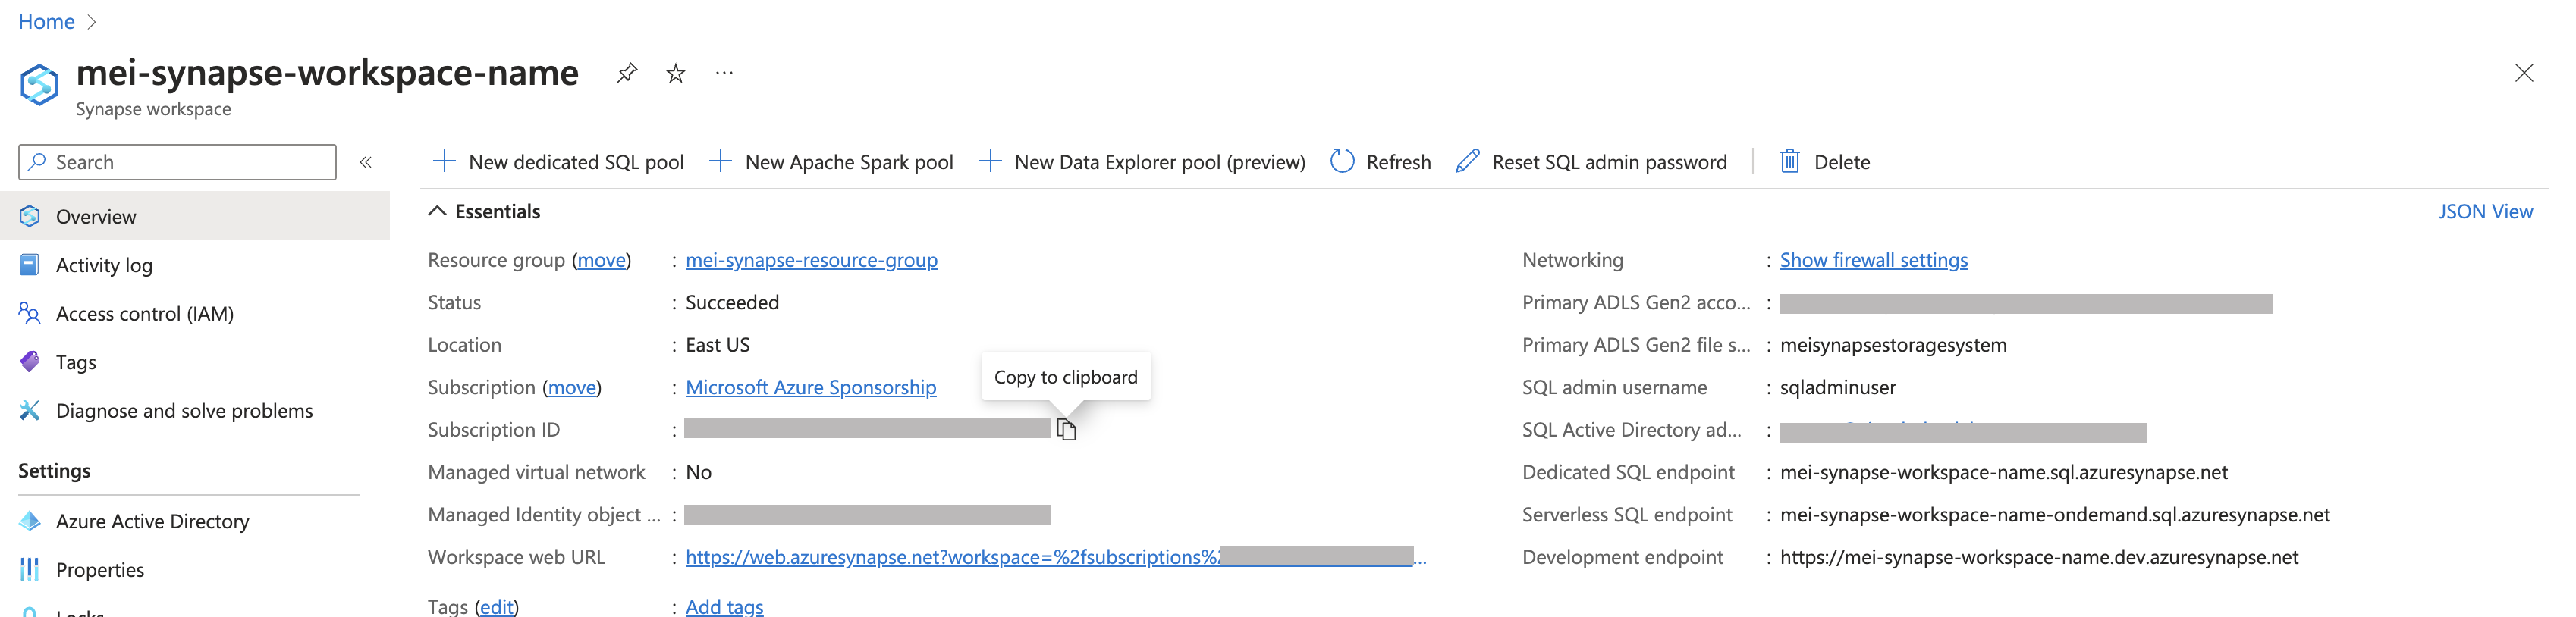
Copy and paste your Synapse Resource Group Name and Subscription ID from your Synapse workspace.
Click on Fetch environments.
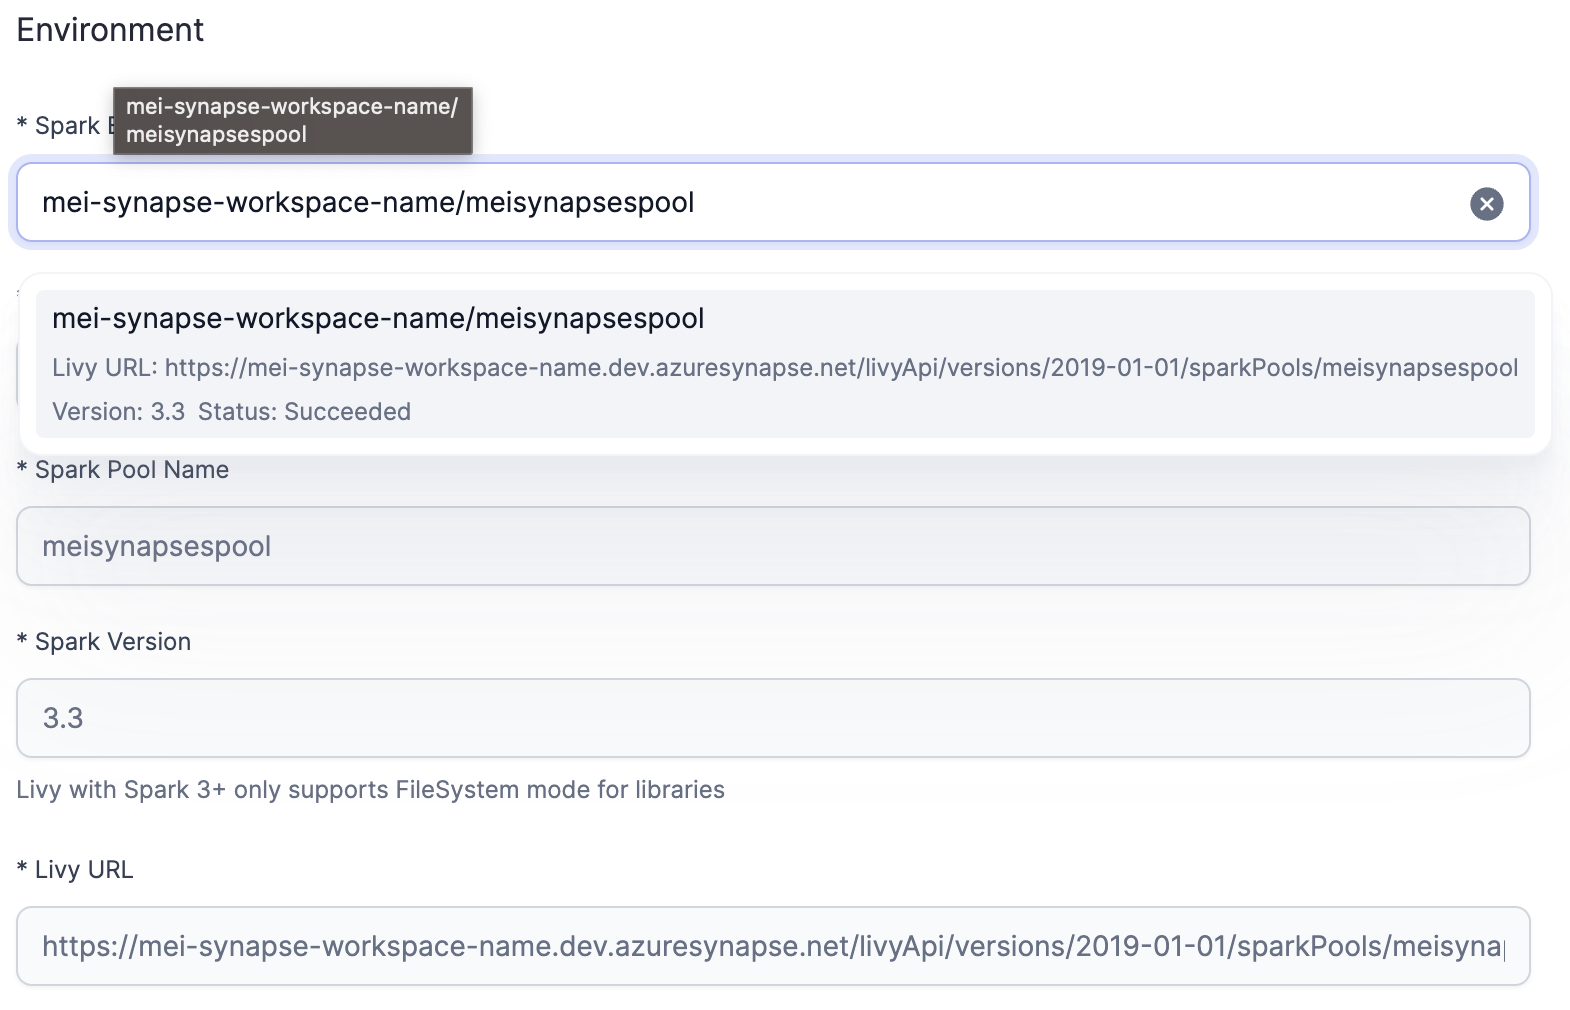
Select your Spark pool from the Spark environment dropdown. All other fields should be automatically populated after selecting your Spark Pool.
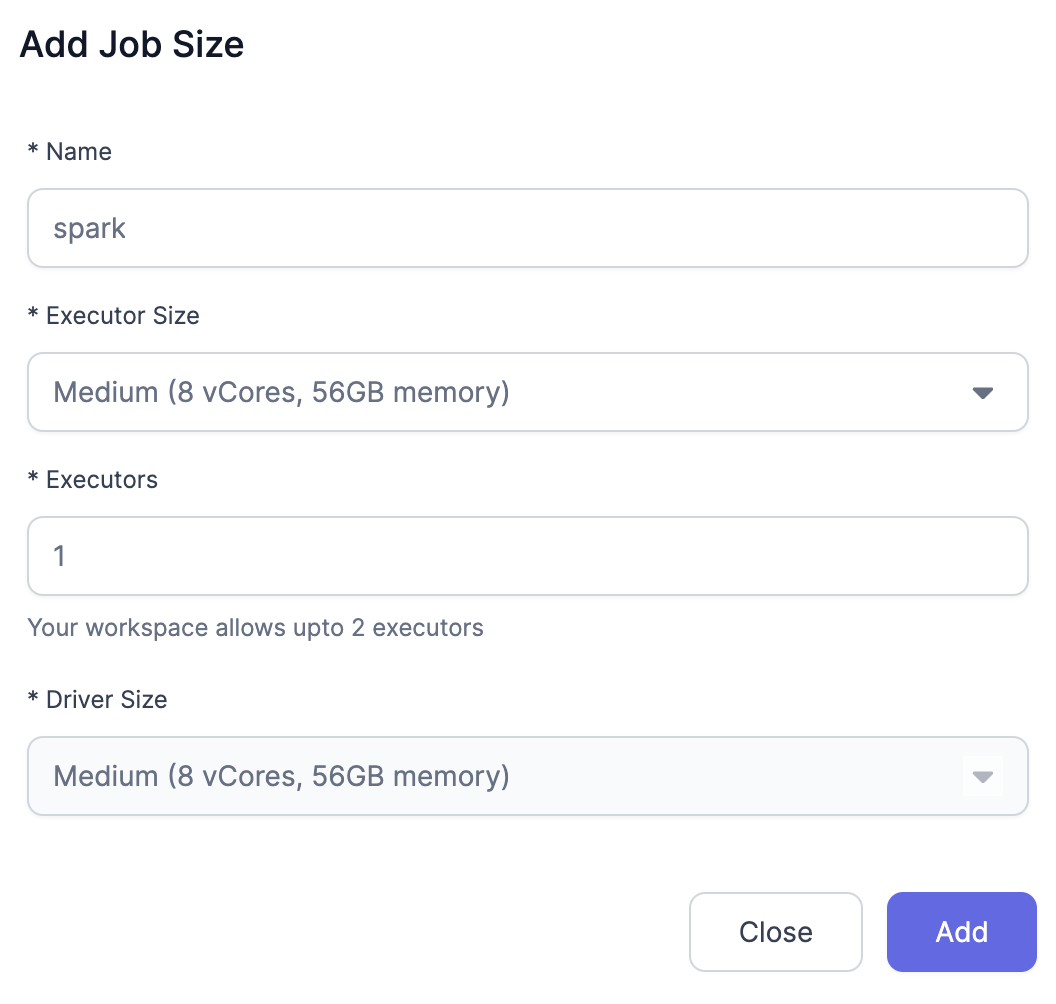
Click on Add Job Size and configure the Job size that you would like to use for processing.
Now we configure the dependencies.
Under Scala enter Path
https://prophecypublicazure.blob.core.windows.net/prophecy-public-libs/prophecy-scala-libs/
Under Python enter Path
https://prophecypublicazure.blob.core.windows.net/prophecy-public-libs/prophecy-python-libs/
Click on Complete.
Your Fabric for Azure Synapase Fabric is configured! Try creating a cluster using the Fabric that you've just created and attach to it.
Run a simple Pipeline and make sure that the interim returns data properly.