Databricks SQL
Databricks SQL Warehouse offers seamless integration into the Databricks ecosystem. Follow the steps below to create a Fabric in Prophecy so that you can execute data transformations on your Databricks Warehouse.
Create a Fabric
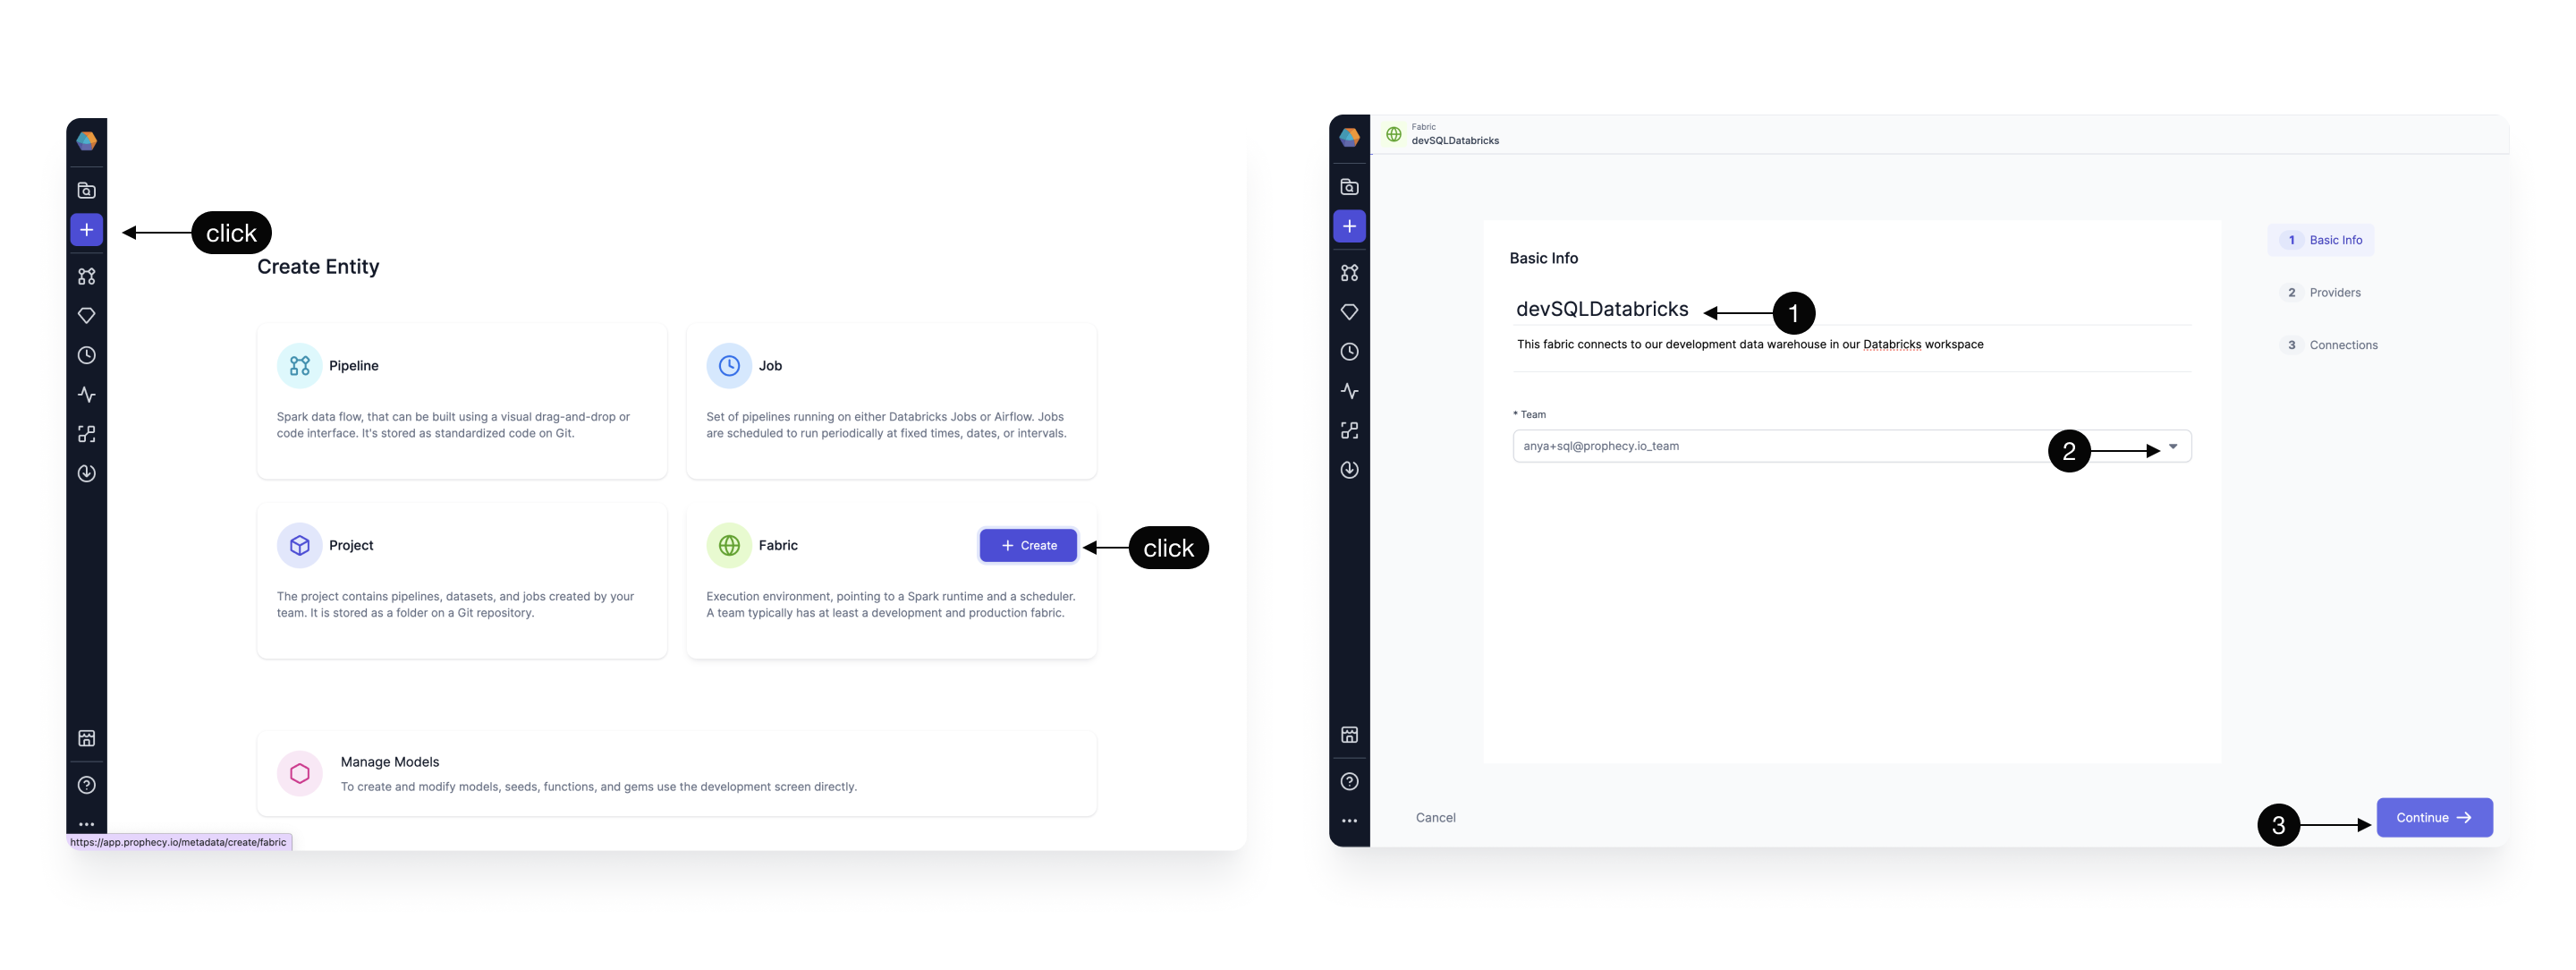
Create an entity by clicking the plus icon. Click to Create a Fabric. There are three steps to creating a Fabric:
- Basic info
- Providers
- Connections (optional)
Basic Info
Each Fabric requires some Basic information
| Basic Info |
|---|
| 1 - Title - Specify a title, like devDatabricks, for your Fabric. “dev” or “prod” are helpful descriptors for this environment setup. Also specify a description (optional). |
| 2 - Team - Select a team to own this Fabric. Click the dropdown to list the teams your user is a member. If you don’t see the desired team, ask a Prophecy Administrator to add you to a team. |
| 3 - Continue to the Provider step. |
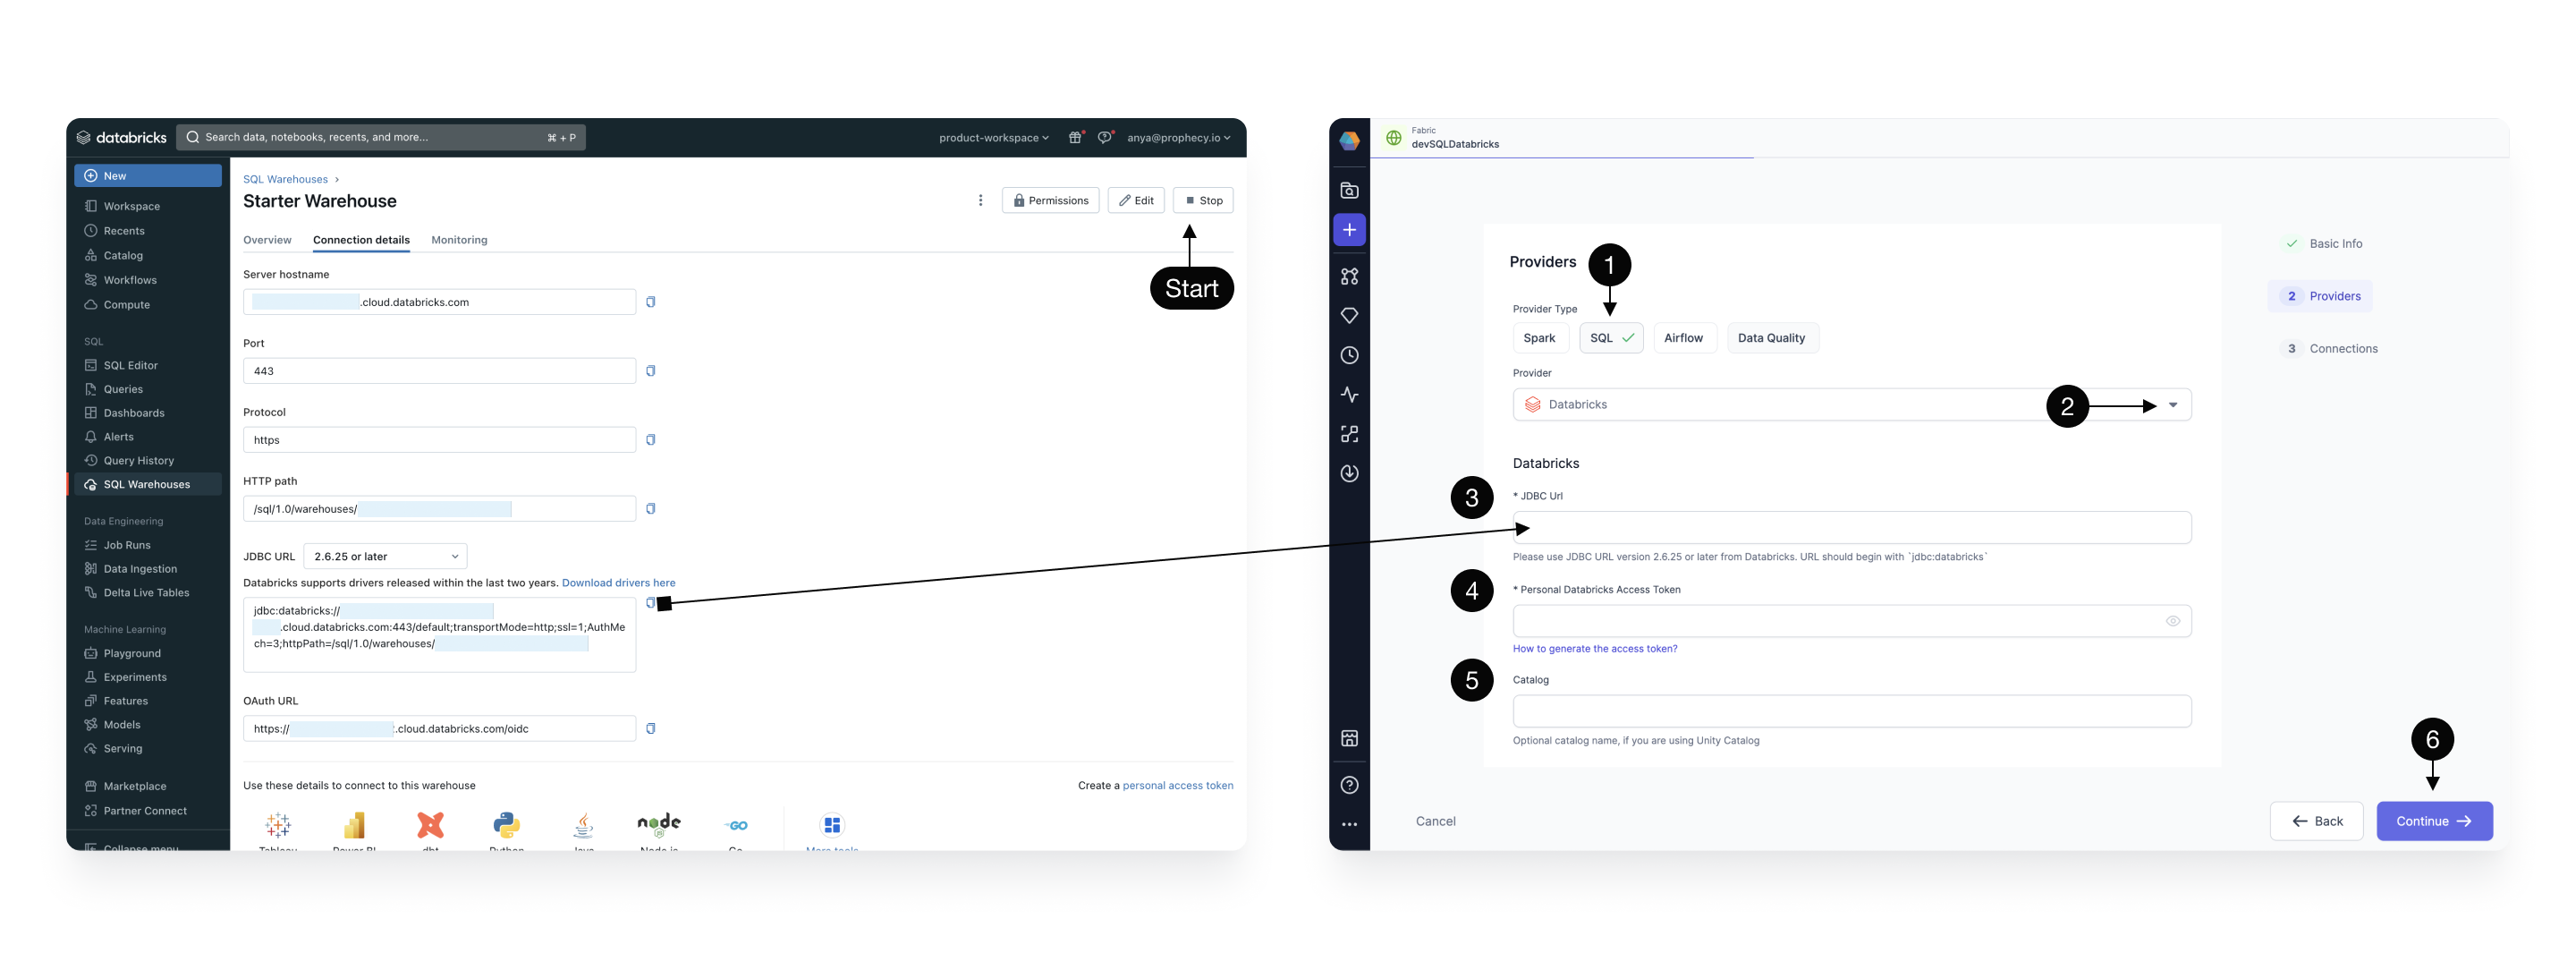
Provider
The SQL provider is both the storage warehouse and the execution environment where your SQL code will run. Be sure to Start the Databricks Warehouse before trying to setup the Fabric.
| Provider details |
|---|
| 1 - Provider Type - Select SQL as the Provider type. (Alternatively, create a Spark type Fabric using instructions here or an Airflow type Fabric following these instructions.) |
| 2 - Provider - Click the dropdown menu for the list of supported Provider types. Select Databricks. |
| 3 - JDBC URL - Copy the JDBC URL from the Databricks UI as shown. This is the URL that Prophecy will connect for SQL Warehouse data storage and execution. |
| 4 - Personal Databricks Access Token - This is the token Prophecy will use to connect to Databricks. Each user will need to apply their own token. To generate a Databricks PAT follow these instructions. |
| 5 - Catalog - (Optional) Enter the Catalog name if you are using Unity Catalog |
| 6 - Continue to the optional Connections step. |
Connections
(Optional) Browsing data catalogs, tables, and schemas can be a time-intensive operation especially for Warehouses with hundreds or thousands of tables. To address this challenge, Prophecy offers a Metadata Connection to sync metadata from the data provider at regular intervals. These steps describe how to setup a metadata connection once a Databricks SQL Fabric is created.
Using Fabrics
Completed Fabrics will appear on the Metadata page and can be managed by Team admins.
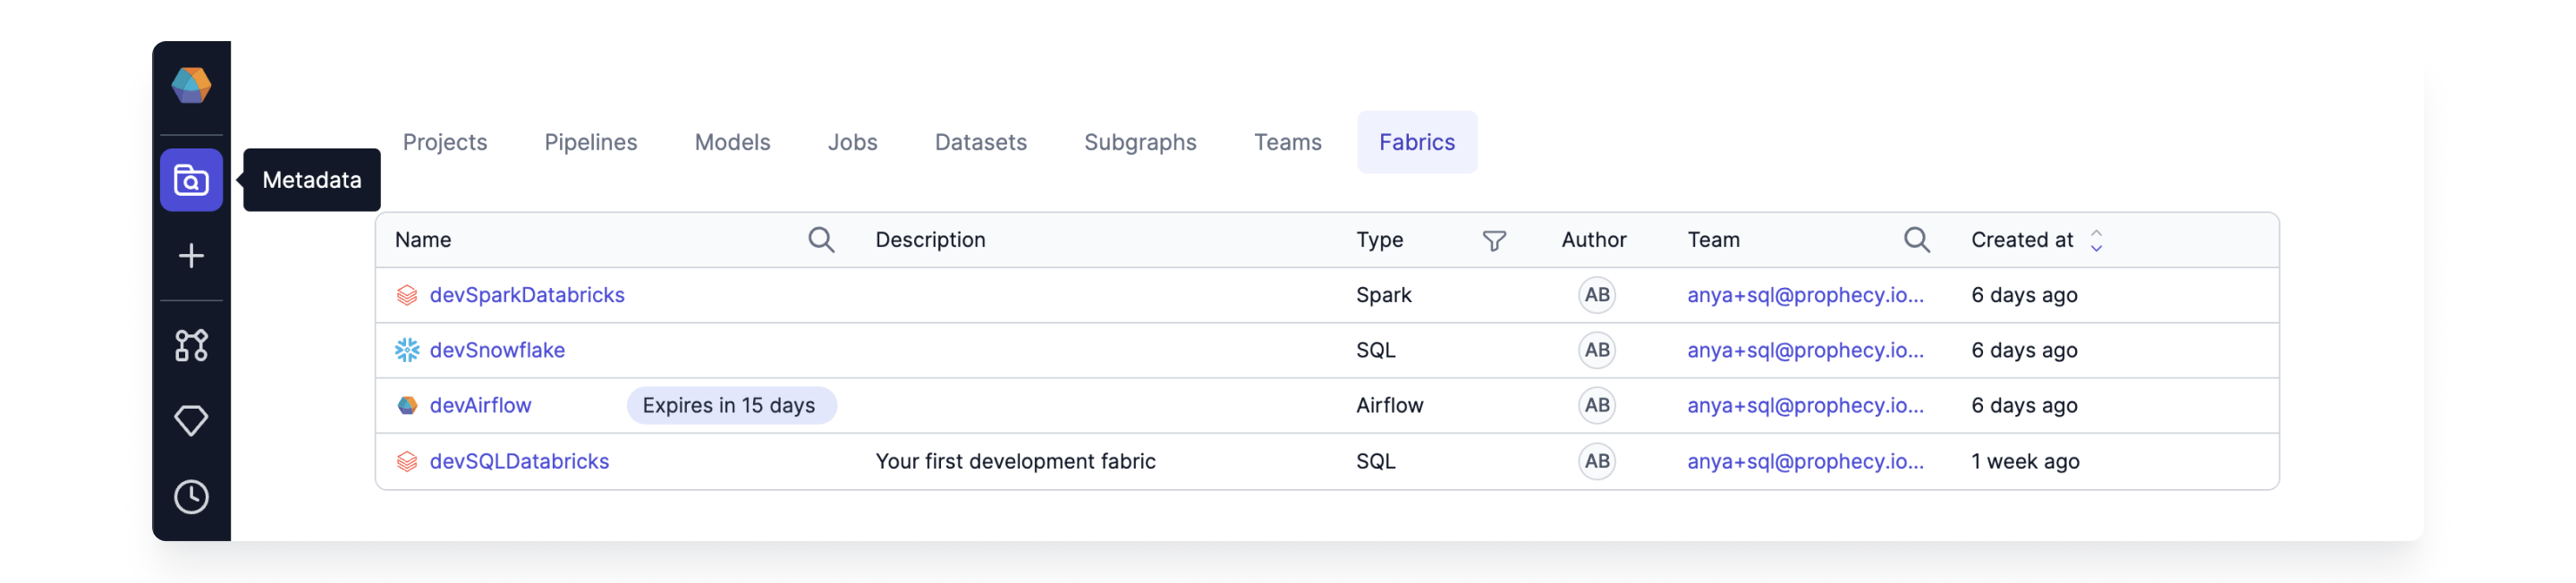
Each team member can attach completed Fabrics to their Projects and Models.
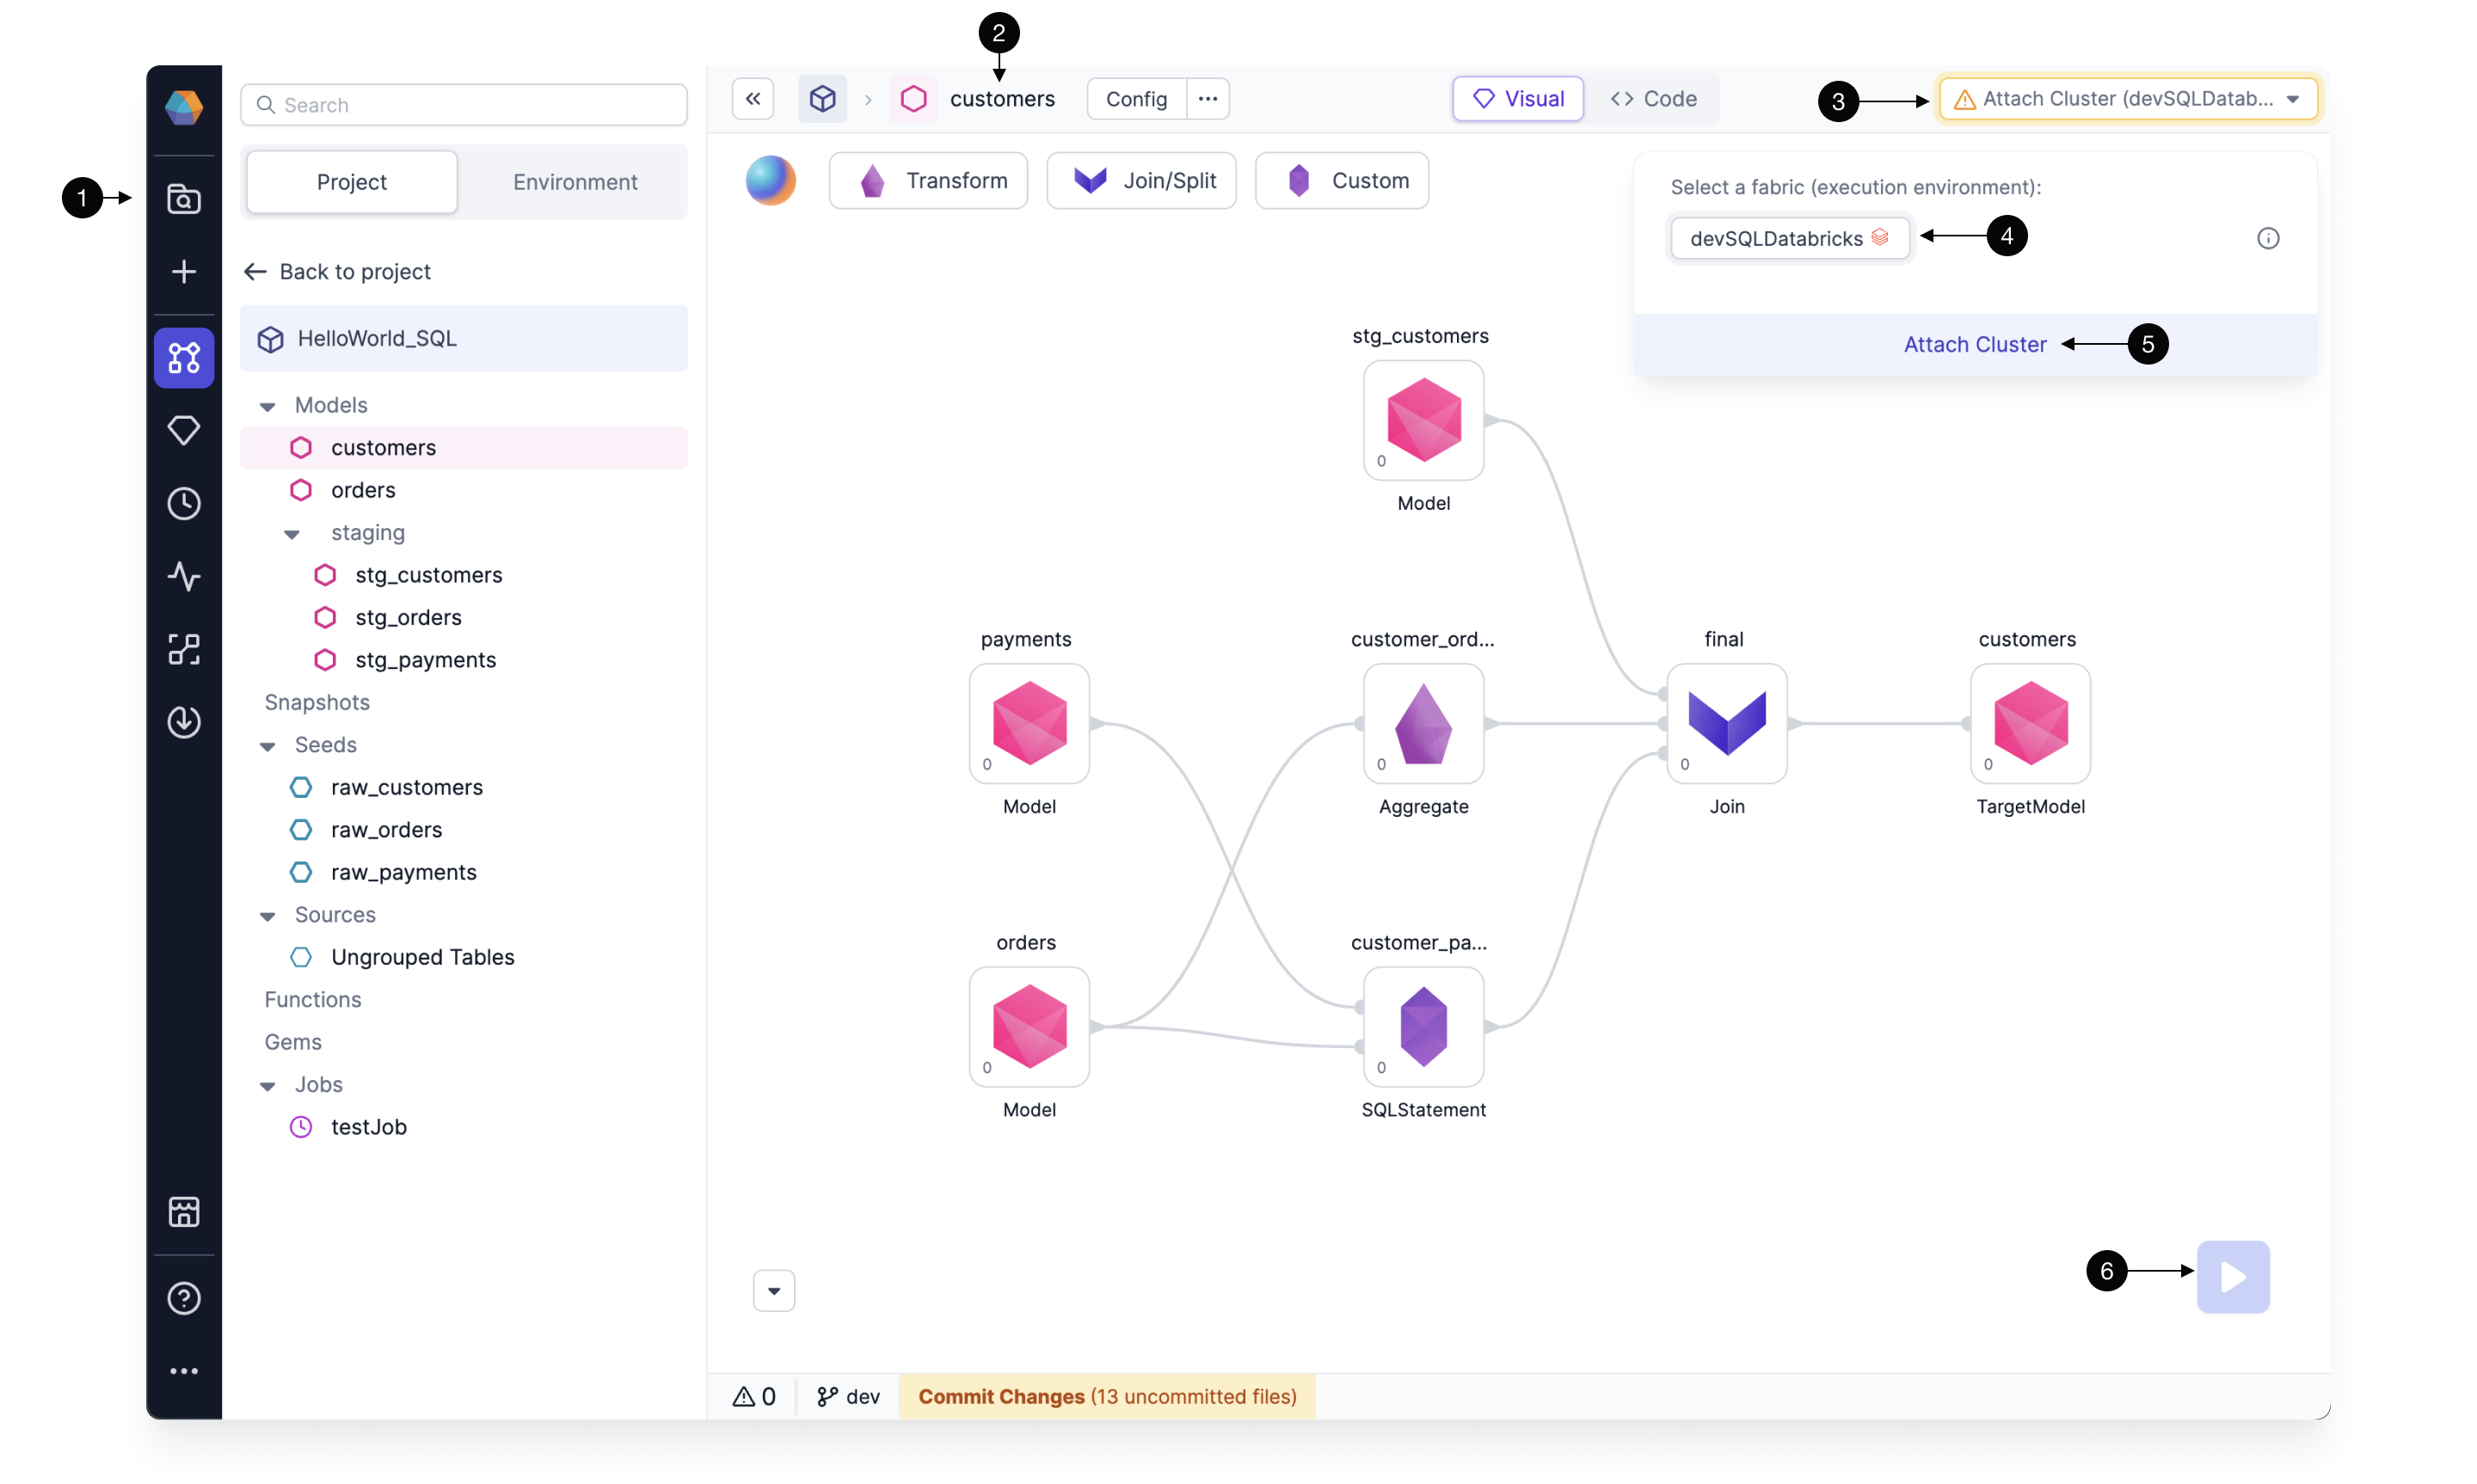
| Attach a Fabric to a Model |
|---|
| 1 Metadata - Click the Prophecy Metadata and search for a SQL Project or Model of interest. Open the Model. |
| 2 Model - Here we have opened a Model called "Customers." |
| 3 Attach Cluster Menu - This dropdown menu lists the Fabrics and execution clusters available to this Project, according to the Team. |
| 4 Databricks Fabric - The available Fabrics appear here. Only SQL Fabrics are available to attach to SQL Projects. |
| 5 Attach Cluster - The Databricks Warehouse can be attached to the Model for execution. |
| 6 Run Model - Once a Fabric and Cluster are attached to the Project, the Model can be run interactively using the play button. |
Remember, each user will be prompted to update the Fabric with their own credentials. Prophecy respects these credentials when accessing Databricks catalogs, tables, databases, etc.
Once a Project is attached to a Fabric, and the Project is released, the Project can be scheduled to run on a regular frequency using Databricks Jobs