CI/CD for Spark pipelines
Learn how to set up continuous integration and deployment (CI/CD) for your Prophecy data pipelines using environment separation and testing. This page outlines how to:
- Configure multi-environment deployments
- Set up testing and validation
- Deploy pipelines using Prophecy's built-in tools or external CI/CD systems
Prerequisites
To set up CI/CD successfully in Prophecy, ensure that you have:
- Access to target execution environments (Databricks workspaces, for example)
- Empty Git repositories configured for your projects
- Understanding of your data pipeline requirements and SLAs
Environment setup
We recommend setting up separate environments (fabrics) for each stage of deployment. The table below illustrates one example of a multi-fabric setup.
| Fabric | Purpose | Data | Access | Cluster Size |
|---|---|---|---|---|
| Development | Feature development and initial testing | Synthetic or anonymized datasets | Dev team | Small |
| QA/Staging | Testing and validation | Production-like data samples | QA team | Medium |
| Production | Live data processing | Real production data | Prod team | Large |
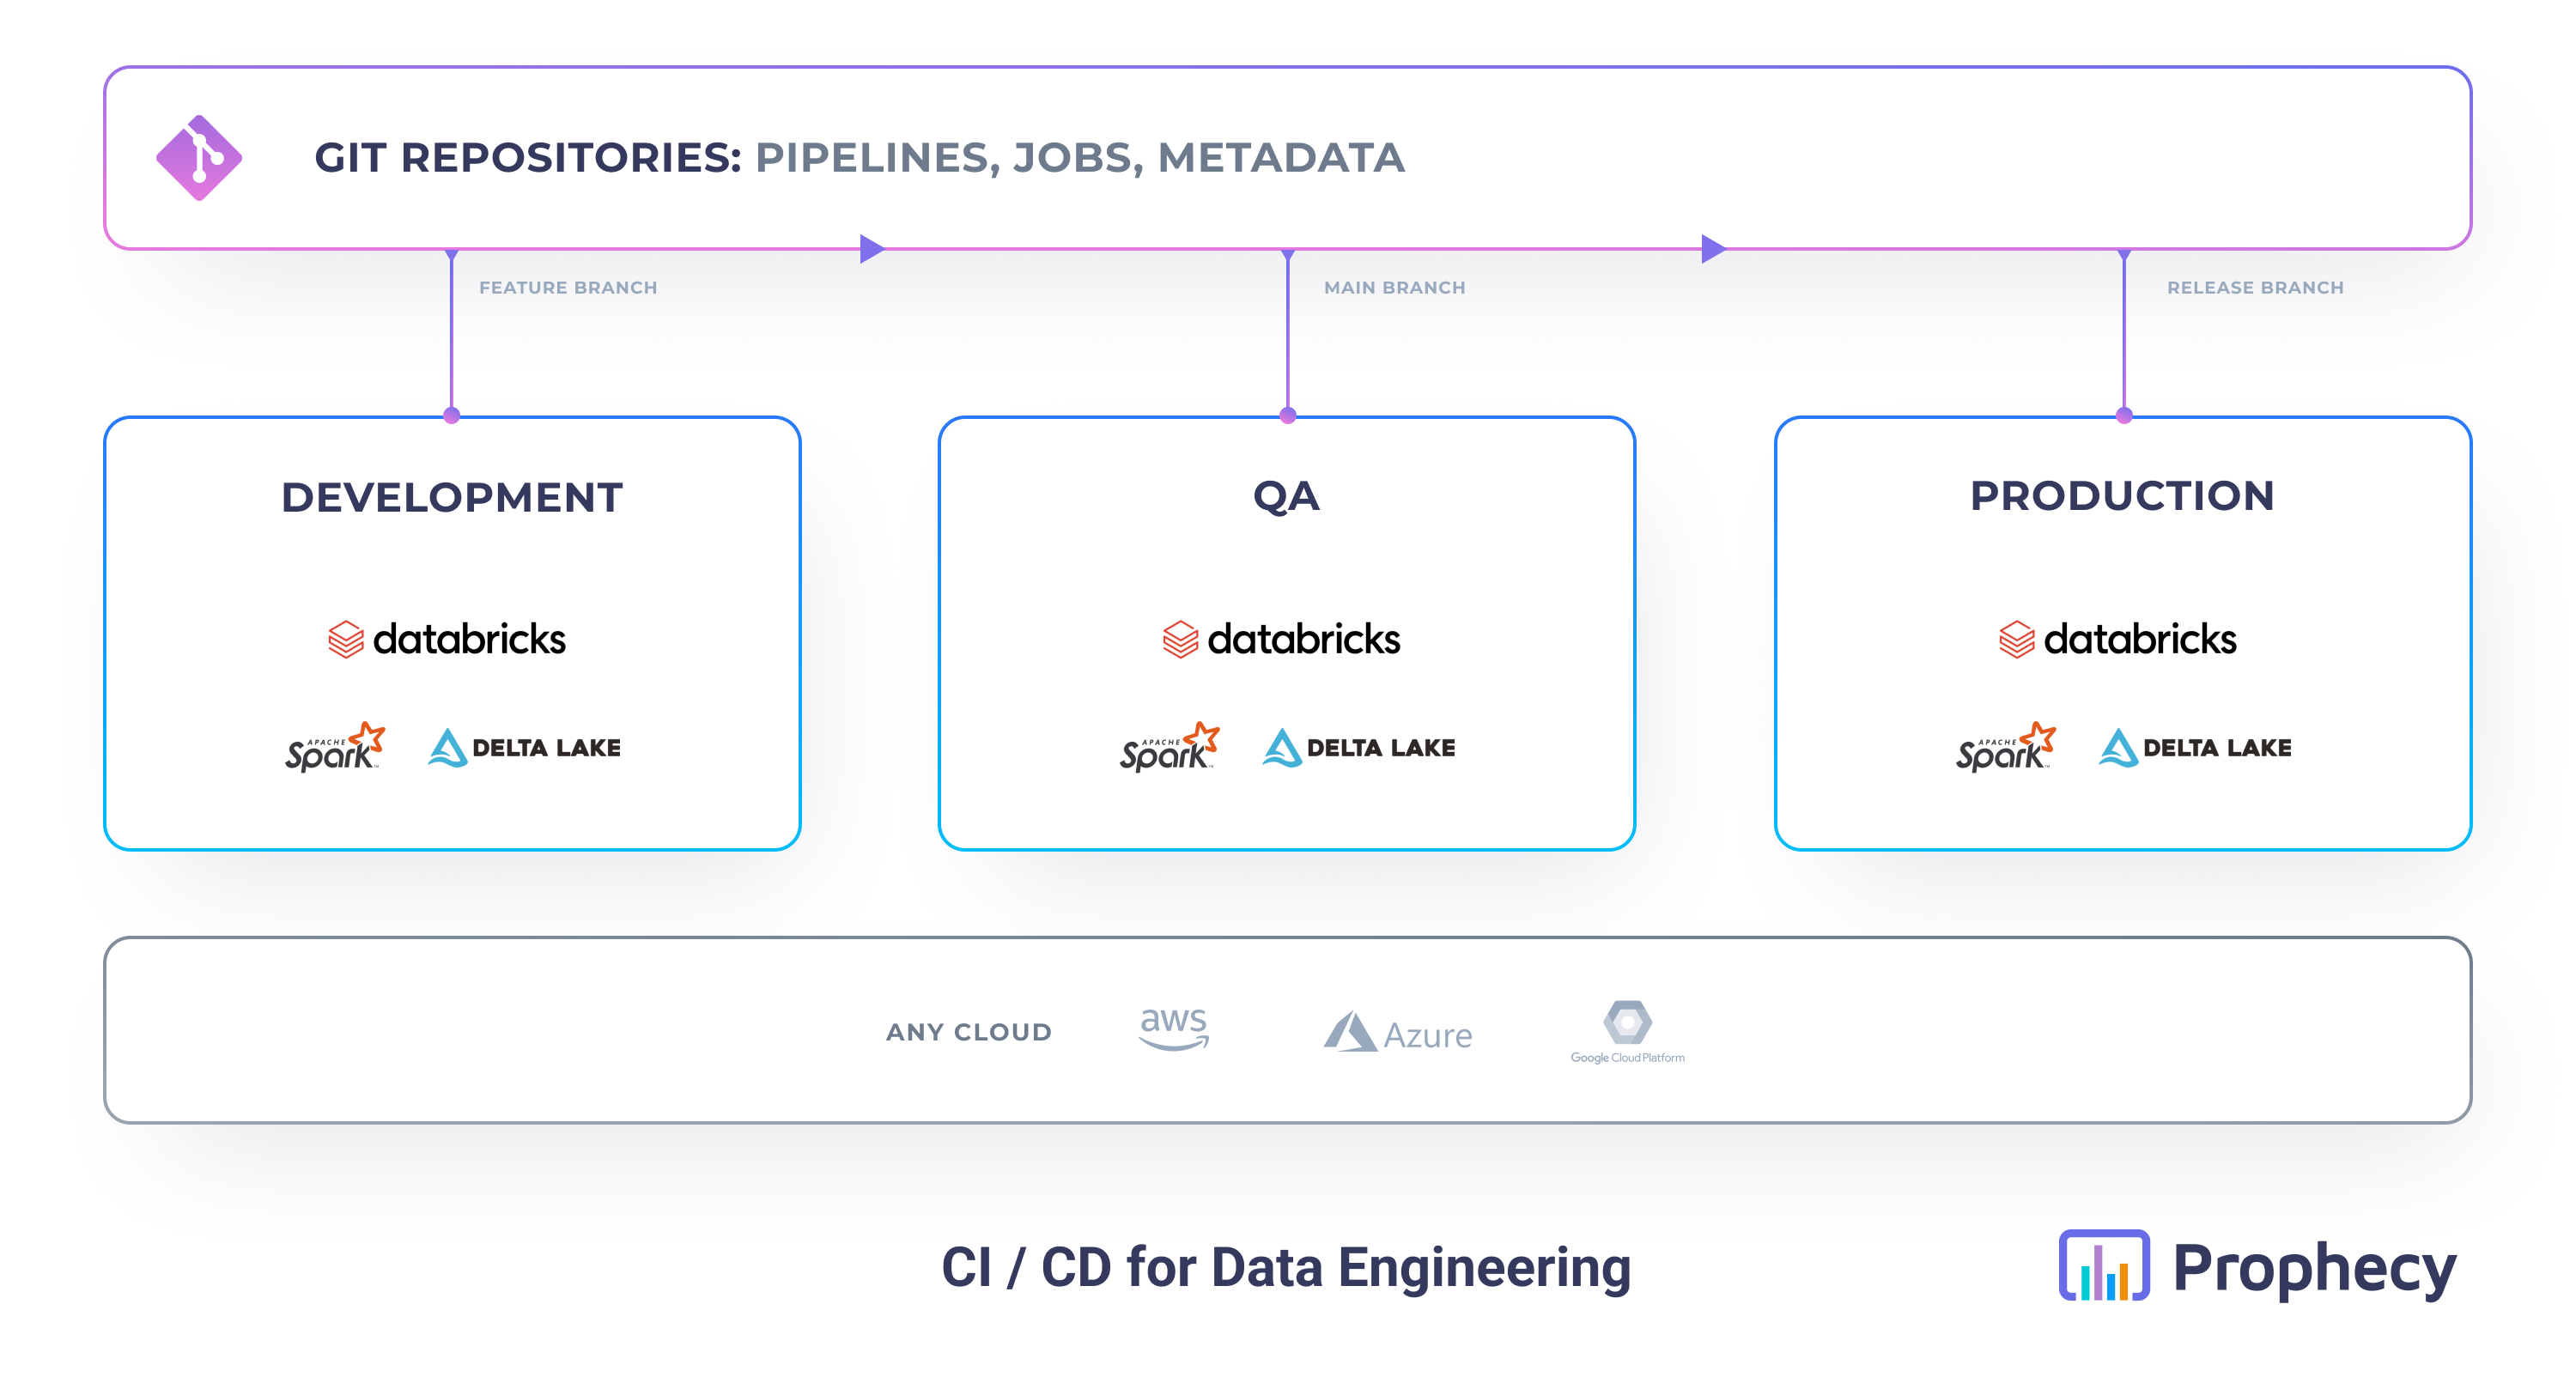
To learn more about the relationship between fabrics, projects, and teams, visit Team-based Access.
While you are not required to have multiple execution environments in Prophecy, it is best practice to keep development and production data and access separate.
Pipeline development workflow
Here is an example pipeline development workflow for teams that leverage multiple environments.
Step 1: Create a project
Start by creating a new project in Prophecy. The project should have its own dedicated Git repository, which helps maintain a clean version history and enables collaboration across teams. The project should be assigned to a team that includes every user who will need to access this project throughout its lifecycle. This is possible because the project team can differ from the fabric team, which should be more restrictive.
While you can technically use an empty directory to host your Prophecy project instead, this is not recommended.
Step 2: Develop and test
Develop pipelines in the development environment using the dev branch. This stage involves building pipelines and configuring pipeline parameters to handle different runtime scenarios or environment-specific values. Execute pipelines interactively during development and inspect runtime logs to debug and validate pipeline behavior. During development, you can also create jobs that will automate pipeline execution after deployment.
Step 3: Deploy to QA
Once development and initial validation are complete, the QA team can begin validating the pipelines by running them interactively in the QA environment. Then, changes to the project can be merged to the main branch and deployed in the QA environment to test if scheduled pipelines run as expected. This stage ensures that your pipelines and jobs function as expected in a controlled, production-like setting before they are released to live systems.
Step 4: Deploy to production
After the QA team has validated the project, the project can be deployed to production. Typically, a small, designated platform team is responsible for this step. The project is deployed to the production fabric, where jobs operate on real production data and run at scale. Jobs in production should ideally execute using a service principal rather than a user identity, since it is an unattended operation.
Project deployment options
You can deploy Prophecy projects using either the built-in Git-based workflow or through an external CI/CD system using the Prophecy Build Tool (PBT). Both approaches support multi-environment pipelines and can integrate automated testing into your release process.
Option 1: Prophecy-native CI/CD
Prophecy includes a native Git-based CI/CD workflow integrated directly into the project editor. This allows you to manage the entire lifecycle without leaving the Prophecy interface. In Prophecy's Git-based workflow, a release marks a specific version of your project by creating a Git tag, while deployment builds and pushes that version to your chosen environment. These steps usually run together but can also be executed independently. As part of the release process, Prophecy automatically builds the code, runs unit tests, and packages everything needed (such as JARs or wheels) to deploy pipelines and jobs.
- Git to learn more about the Git workflow
- Unit tests for validating pipeline functionality
- Deployment to deep dive into the phases of project deployment
Option 2: External CI/CD with PBT
If your organization already uses an external CI/CD system, you can integrate Prophecy projects using the Prophecy Build Tool (PBT), a command-line interface designed for automation. PBT works with systems like GitHub Actions and Jenkins to build and deploy Prophecy projects from a Git repository.
This approach supports the same multi-environment model as native CI/CD. Use the --fabric-ids flag in your CI/CD configuration to target specific fabrics during deployment.
To use PBT in your CI/CD pipeline:
- Install the Prophecy Build Tool.
- Configure secrets to securely store credentials and environment connection details.
- Set up your GitHub Actions or Jenkins workflow to include build and deploy steps using PBT.
For detailed instructions and examples, see Prophecy Build Tool (PBT).