Data modeling for Engineers
This tutorial will teach you how to use Prophecy for data modeling. You will learn how to connect Prophecy to a SQL warehouse (in this case, Snowflake) and transform your data in the visual canvas.
This tutorial will not cover pipeline development in SQL projects, which requires Prophecy Automate. It will only cover data transformations that can be executed on a SQL warehouse.
Requirements
For this tutorial, you will need:
- A Prophecy account. You can use a 21 day free trial for this tutorial.
- A Snowflake account.
- A GitHub account.
If you want to use a different SQL provider such as Databricks, you can set up the fabric and still complete the development section of this tutorial.
Connect to Snowflake
Let's start by connecting Prophecy and Snowflake.
Gather Snowflake credentials
You'll first have to retrieve the following information from Snowflake to pass to Prophecy.
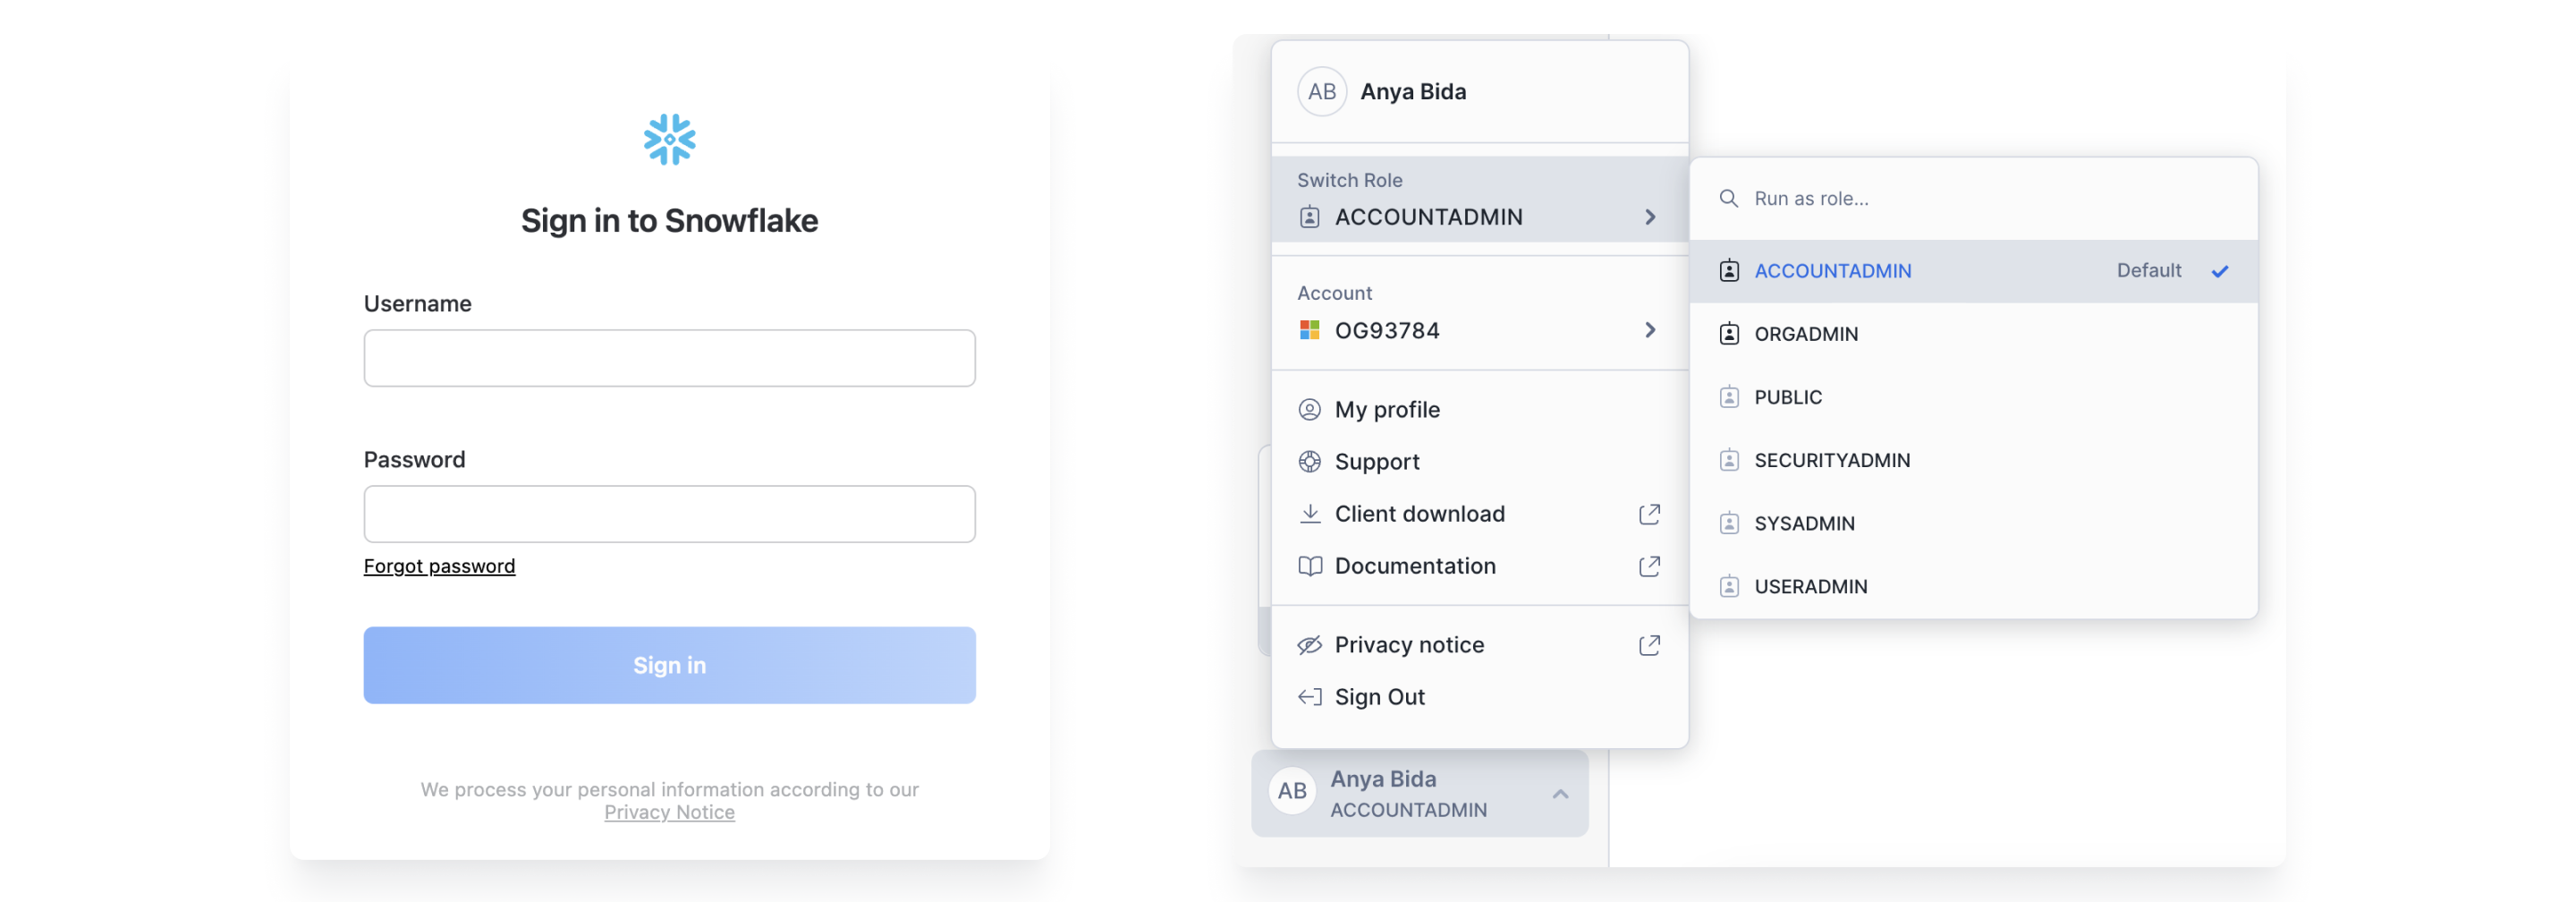
- Open Snowflake.
- Write down your SnowflakeURL. It should look like
https://<org-account>.snowflakecomputing.com. - Note your user's Role in Snowflake.
- Identify which warehouse you want to connect. Make sure the warehouse is started.
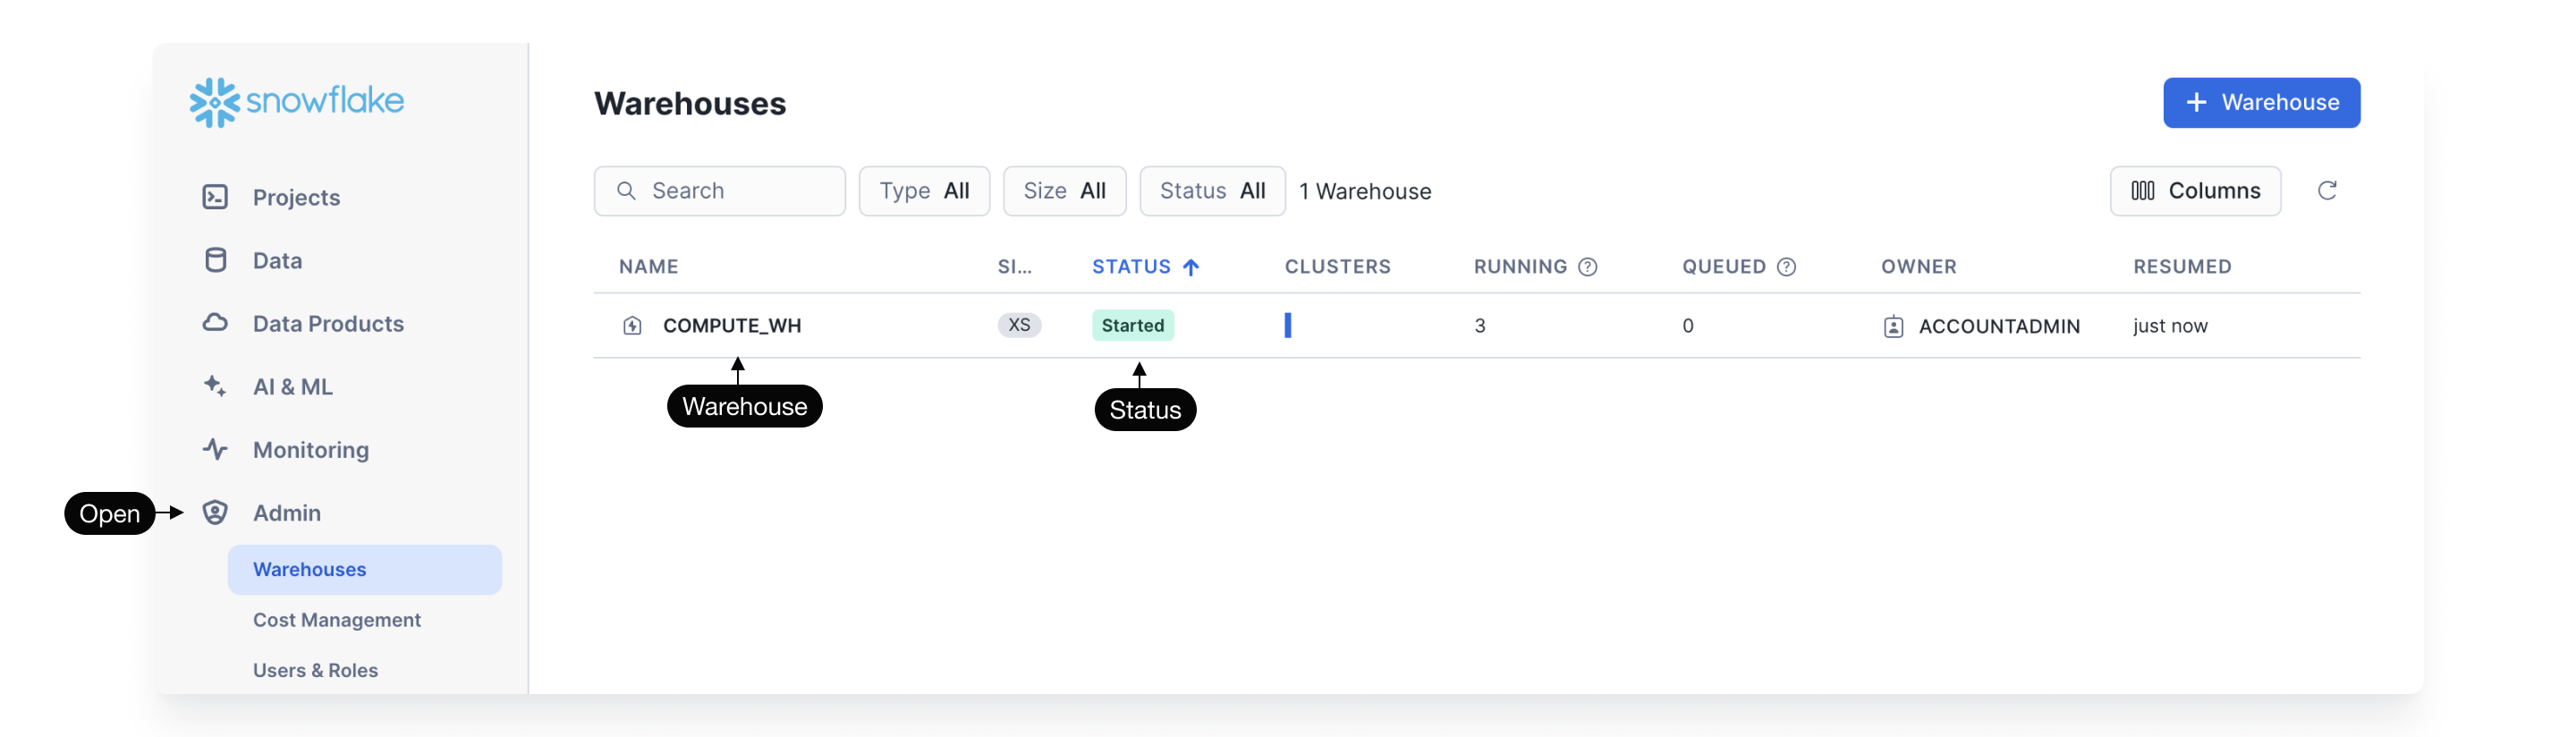
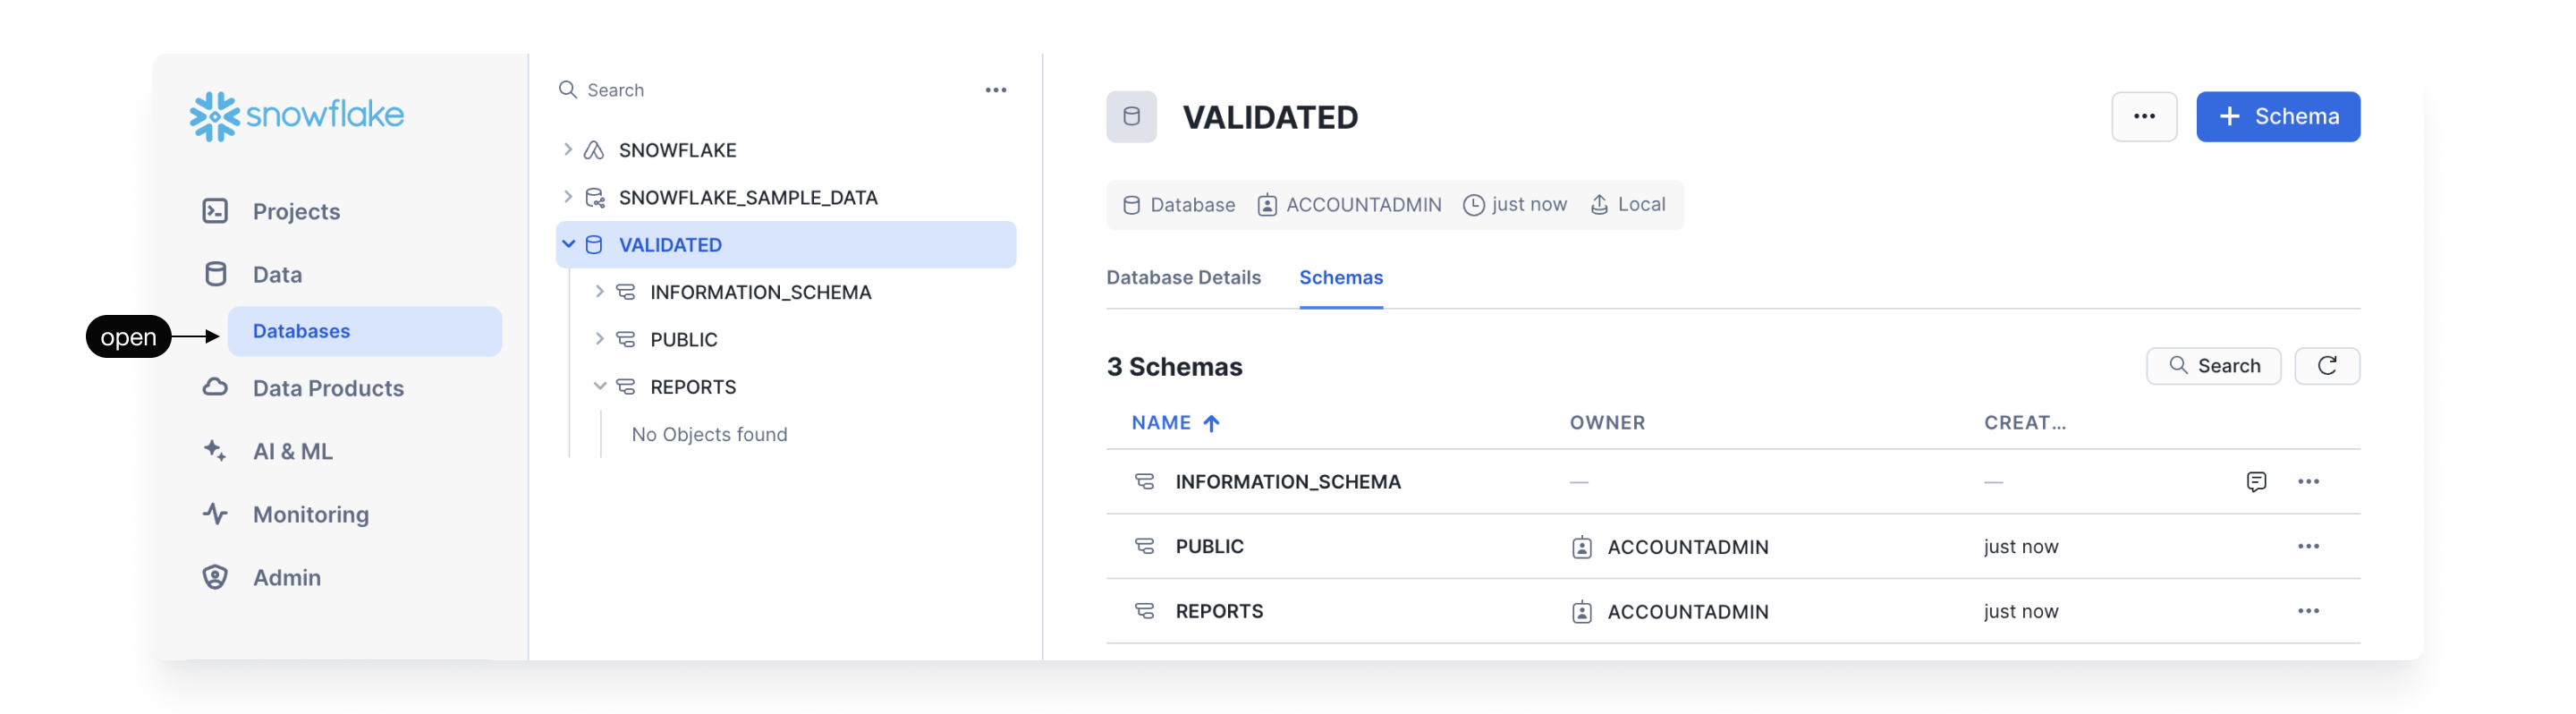
- Identify a database and schema that you want Prophecy to access.
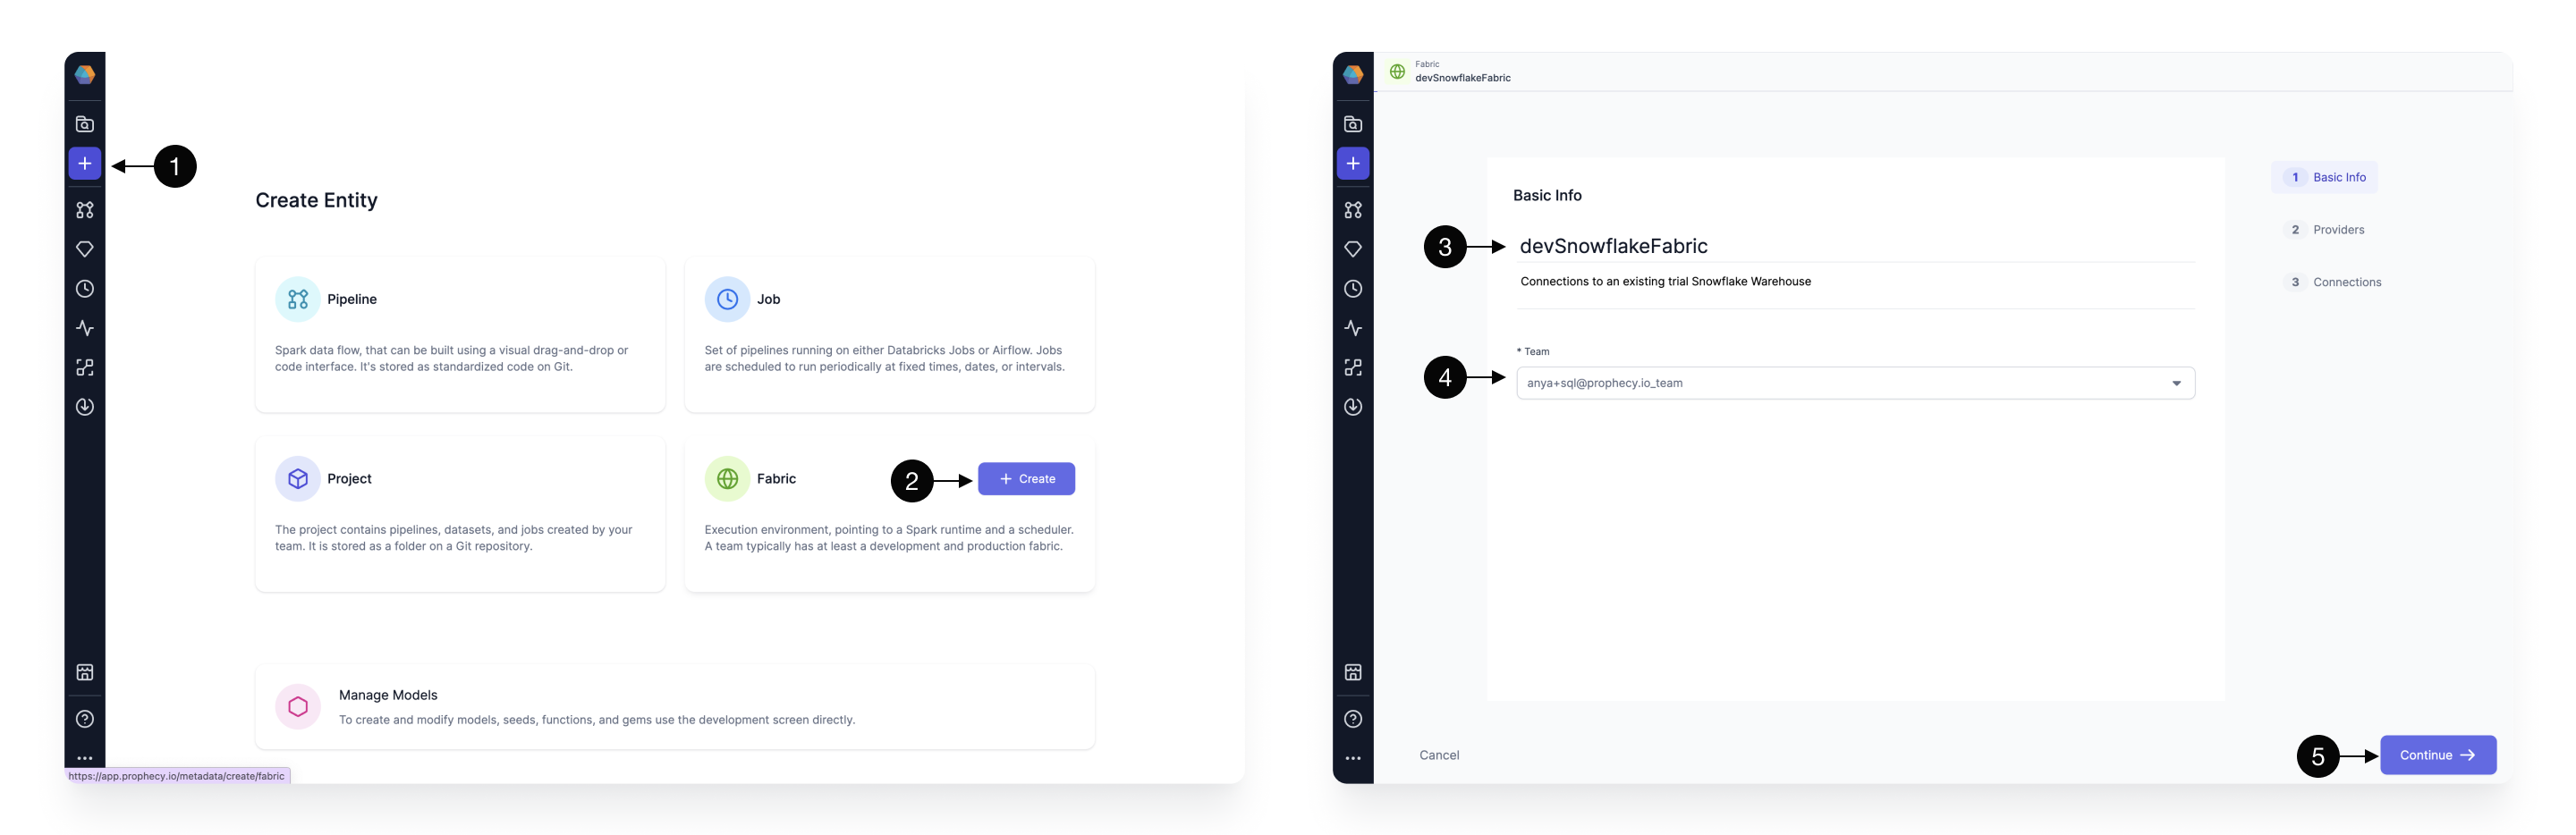
Create a SQL fabric in Prophecy
Since you will only compute models in this tutorial (rather than perform any orchestration), you can create a SQL fabric to use as your execution environment. Let's use the information you gathered in the previous section to create the fabric.
- Click to add a new entity.
- Create a new fabric.
- Specify a name, like devSnowflake, for your fabric.
- Provide a description (optional).
- Select the team that will own this fabric. For this tutorial, you can use your personal team.
- Continue to the next step.
In the Provider tab, complete the following steps:
- Select SQL as the Provider Type.
- Open the Providers dropdown and select Snowflake.
- Add the Snowflake Account URL, which looks like this:
https://<org>-<account>.snowflakecomputing.com. - Add the username of a Snowflake user that Prophecy will use to connect to the Snowflake Warehouse.
- Add the password of the same Snowflake user that Prophecy will use to connect to the Snowflake Warehouse. These credentials are encrypted for secure storage.
- Add the Snowflake role that Prophecy will use to read data and execute queries on the Snowflake Warehouse. The role must be already granted to the Snowflake user provided above and should be scoped according to the permission set desired for Prophecy.
- Specify the Snowflake warehouse for default writes for this execution environment.
- Specify the Snowflake database for default writes for this execution environment.
- Specify the Snowflake schema for default writes for this execution environment.
- Click Continue.
- Do not add any connections. Click Complete to save the fabric.
Create a new project
Next, let's build a new project from scratch.
- Click the Create Entity button on the sidebar and choose Create on the project tile. The project creation screen will open.
- Fill in the project Name and Description (optional).
- Choose the team that will own the project. For this tutorial, you can use your personal team.
- In the Select Template dropdown, choose Custom.
- Change the Project Type to SQL.
- Select Snowflake as your SQL provider.
- Click Continue.
Once the basic project information is filled out, it’s time to configure the Git repository on which we’re going to store our project. You will connect an external GitHub account for this tutorial.
- Leave the default Git storage model as Normal.
- Click Connect Git to connect to a GitHub account that has not yet been configured.
- Choose GitHub as the Git Provider for this project.
- Create an alias that will let you identify your Git account in Prophecy.
- Click Login with GitHub to use OAuth for authentication.
- Sign in and authorize SimpleDataLabs as a valid organization.
- Select Connect to save the Git connection.
Once your GitHub account is set up:
- Select a repository where Prophecy will store all the code for this project. The repository must be empty.
- Keep the automatically populated default branch.
- Keep the
/folder where the project files will be stored. - Click Complete to save your new project.
If you have a valid dbt project in a Git repository, you can import it in Prophecy as a project directly.
Start development
Now, you are ready to click Open in Editor and begin developing!
Checkout development branch
You cannot make changes directly on the main branch. Therefore, you must start by checking out your own development branch.
- Click on Checkout Branch and type
dev/model-tutorialin the Branch field. - Click Checkout. The new branch will be displayed in the footer.
Branches are clones from the current branch. In most cases, you will want to branch from the main branch.
Connect to a fabric
After branch setup:
- Fabric selection should pop-up automatically. If not, you can easily set the fabric by clicking on the Choose cluster dropdown.
- Choose the fabric you just created in the Fabrics list.
- Save the settings.
Prophecy will quickly load all the available warehouses, databases, schemas, tables, and other metadata to let you start running your transformations!
Define data sources
The first step, before building actual transformation logic, is definition of data sources. There are three primary ways to define data sources in a SQL project:
- Seeds let you load small CSV datasets into your warehouse. This is useful for small test datasets or lookup mappings.
- Datasets are table pointers with schema information and additional metadata.
- Models define tables that can serve as inputs to other models.
Create seeds
To create a seed:
- Click on the Add Seed button.
- Name the seed
nations, which will also be the name of the table created. - Define the Path of the seed.
- Click OK to create the seed.
Currently, the seed is still empty. To add values:
-
Paste the contents of this comma-separated CSV file into the code editor.
NATIONKEY,NAME,REGIONKEY,COMMENT
0,ALGERIA,0,Vast Sahara; oil-rich and culture-rich.
1,ARGENTINA,1,Tango; beef; Patagonia.
2,BRAZIL,1,Amazon; Carnival; soccer.
3,CANADA,1,Maple; multicultural; vast wilderness.
4,EGYPT,4,Ancient pyramids; Nile River.
5,ETHIOPIA,0,Coffee origin; diverse culture. -
Switch back to the visual editor and Run the seed.
Develop your first model
A model contains a set of data transformations and represents one table. Each model is stored as a select statement in a SQL file within a project.
- Click + next to Models to add a model.
- Name the model
customers_nationsand keep the default directory path. - Click Create.
- Open the Environment tab and open the SAMPLE_DATA that Snowflake provides.
- Expand the TPCH folder and click Customer. This adds the customer table as a source in your model.
We will join our two source datasets.
- Open the Join/Split gems and add a Join gem to the model canvas.
- Connect the source datasets to the Join input ports.
- Open the Join gem.
- Add the join condition. Join the datasets on
NATIONKEYandC_NATIONKEY. - In the Expressions tile, add any target columns that you wish to appear in the output table.
Interactively Test
Now that our model is fully defined, with all the logic specified, it’s time to make sure it works (and keeps working)! Prophecy makes interactively testing the models incredibly easy.
- Click the Play button on any of the gems and the model with all of it’s upstream dependencies will be executed.
- Once the model runs, the Result icon appears.
- Click the Result icon to view a Sample set of records.
Notice Copilot is offering suggested fixes when errors appear. See how Fix with AI works here. Explore suggested fixes in the canvas, inside each transformation gem, or inside gem expressions.
Code view
The visual developers will appreciate the drag-n-drop canvas, but sometimes it's also nice to view the code. Already Prophecy creates highly performant code behind the scenes. Just click the Code View to reveal the SQL queries we've generated using our visual design editor. Each gem is represented by a CTE or subquery. For example, the Join gem NATIONS_CUSTOMERS is highlighted in both visual and code views.
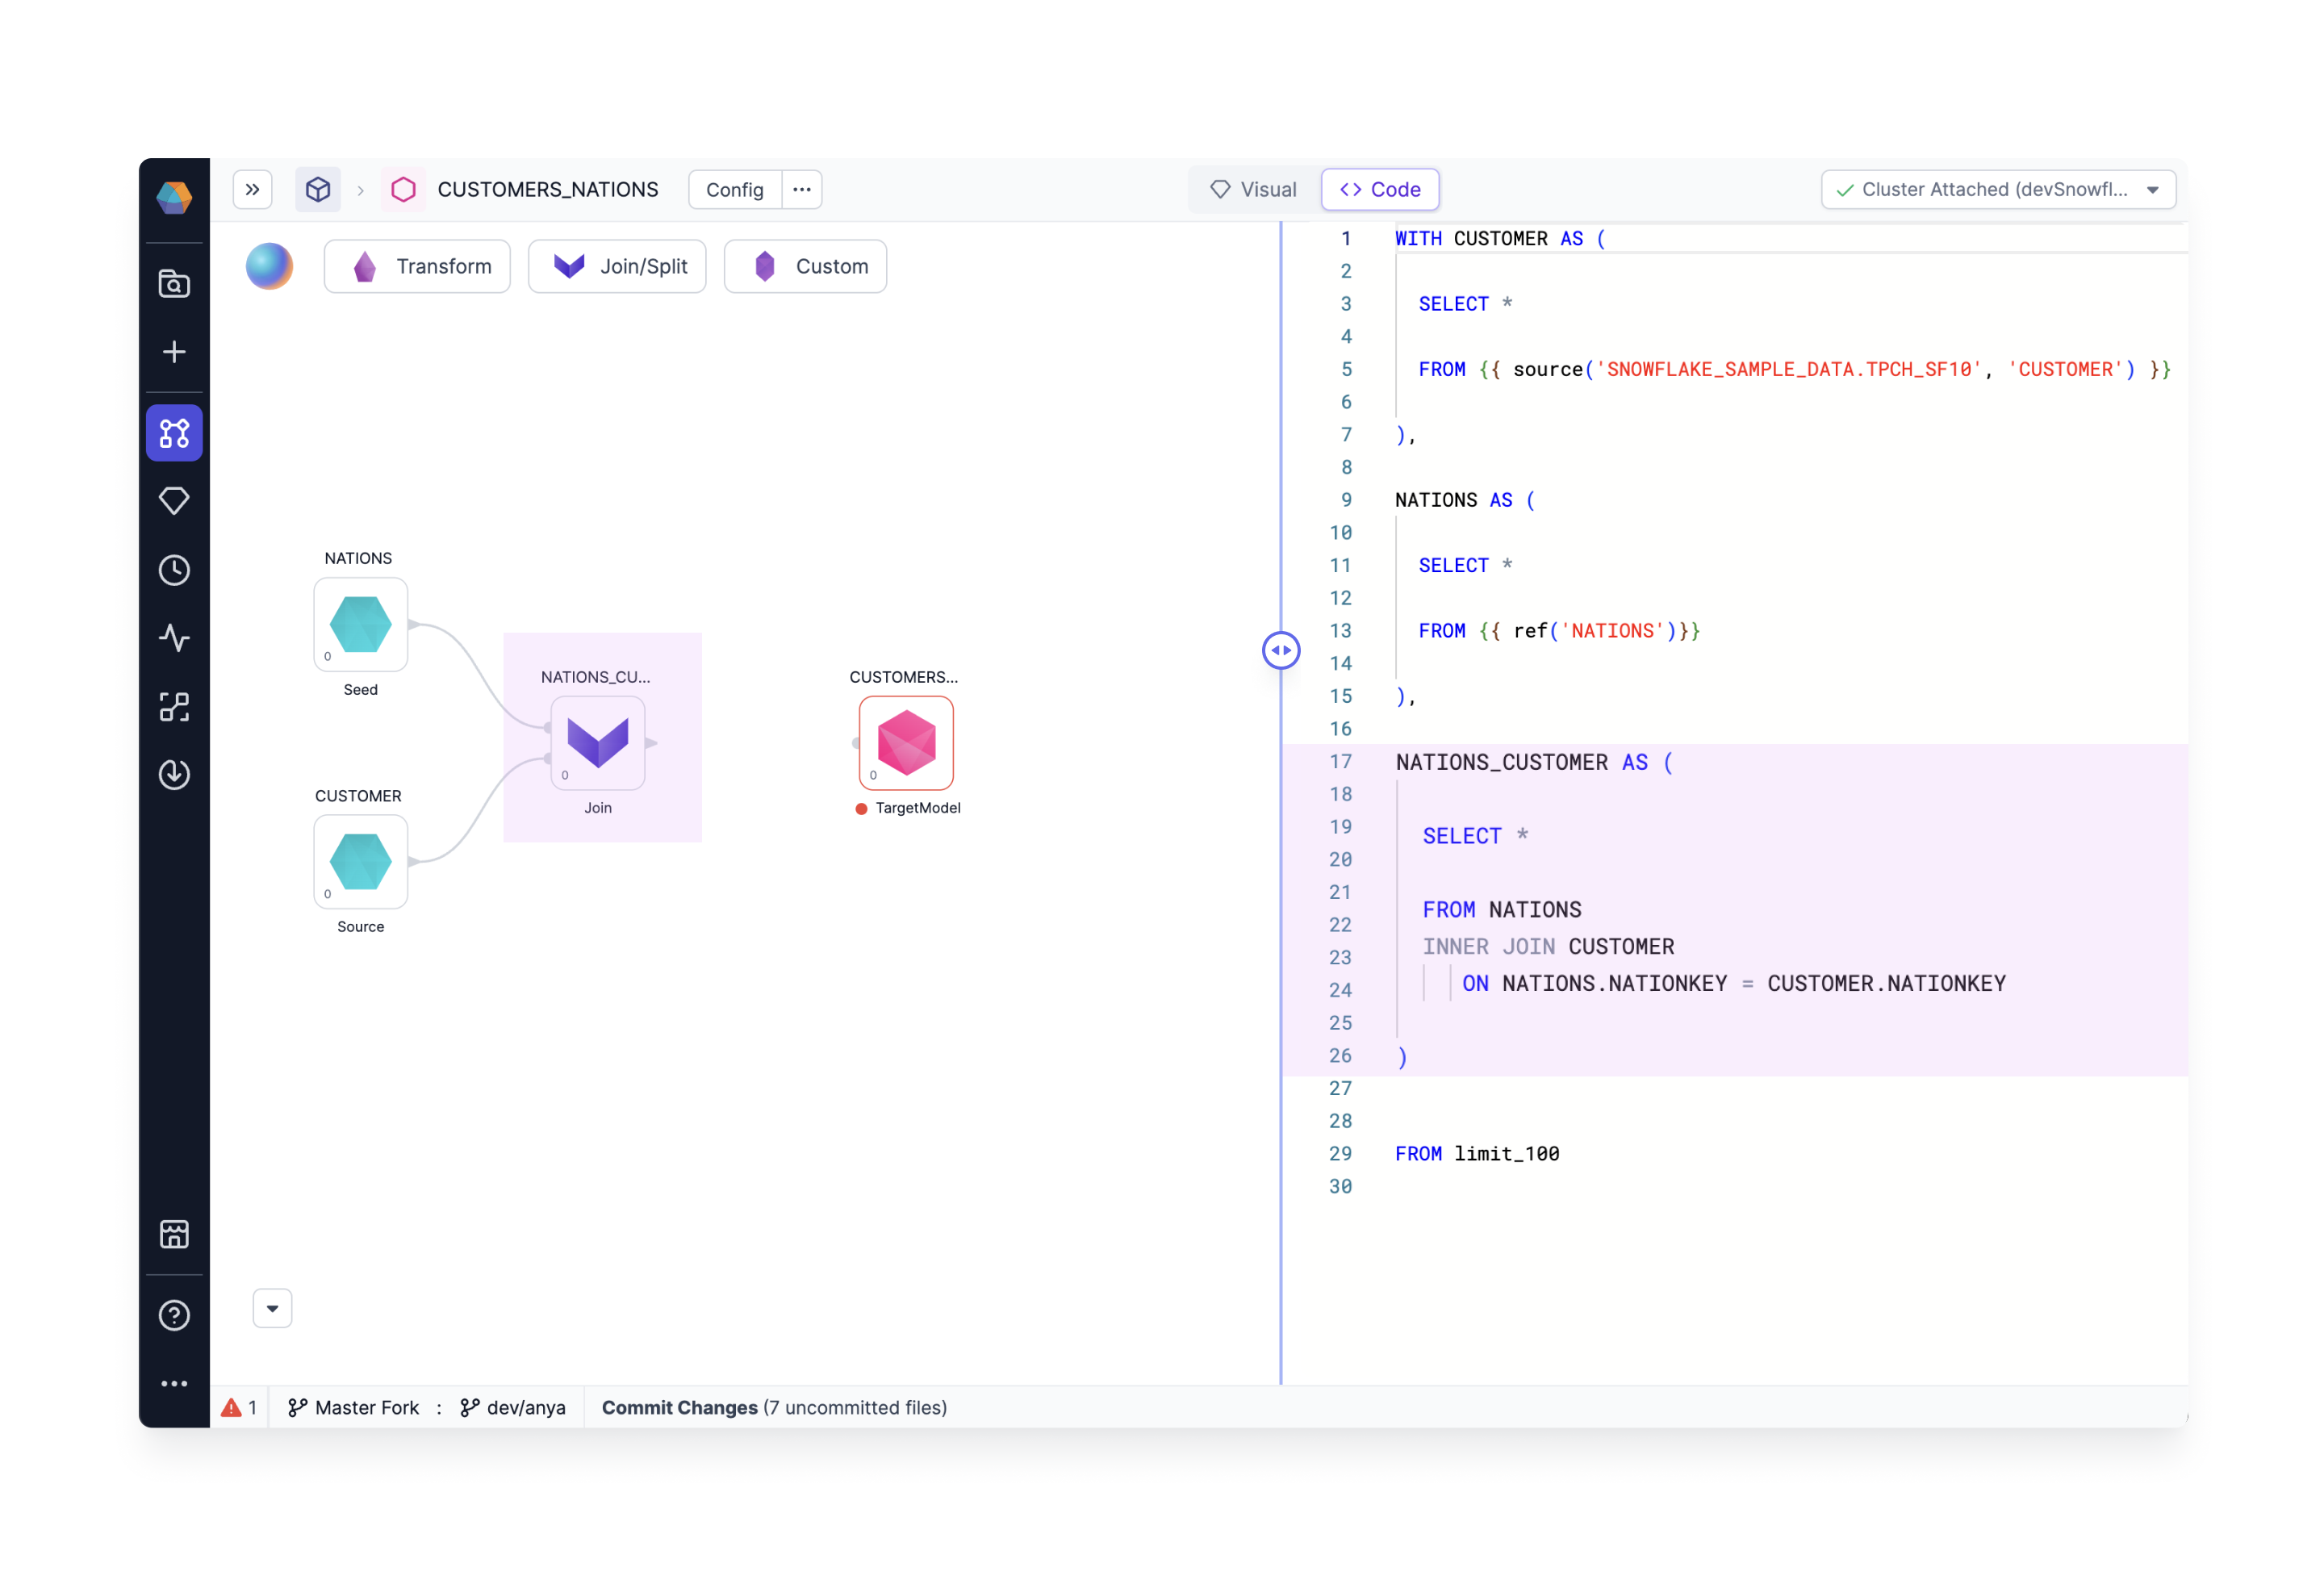
You can also edit the code directly! Add a SQL statement in the code view and notice the visual editor displays the updated transformations. For example, if you add a limit statement in the code view, and a new limit gem will appear in the visual view.
What's next
Great work! You've successfully developed and tested a SQL model on a Snowflake warehouse. If you ever encounter any difficulties, don't hesitate to reach out to us (Contact.us@Prophecy.io) or join our Slack community for assistance. We're here to help!